The COMBINE tab shows the organ's Werks and all their stops, making it very easy to design and organize your own registrations.
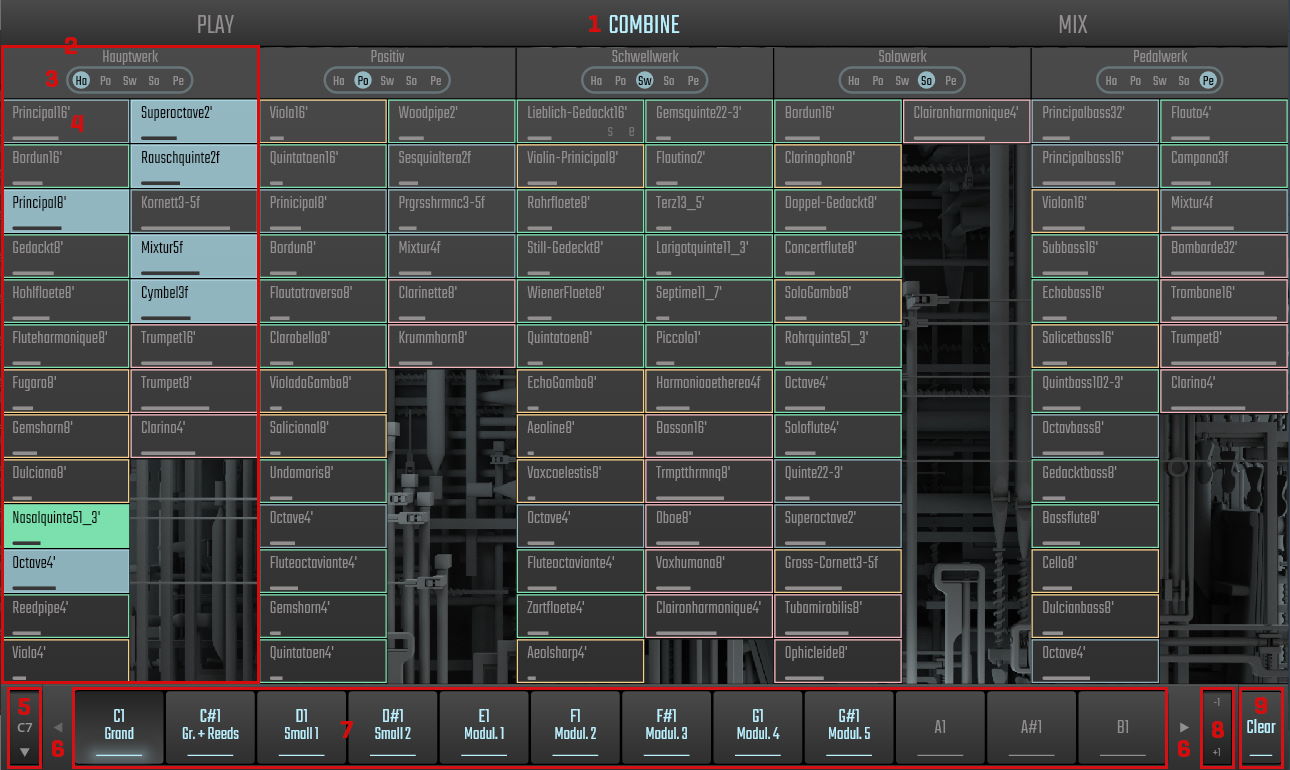
If you hover over the COMBINE tab inscription, an insert will allow you to activate/deactivate the display of names, loudness, and timbre color in the stops. With "NAMES" deactivated, the stop numbers will be displayed. The loudness bar in the lower left of the stop indicates its relative volume and does not represent a current value. This means that even if you set the volume of, let's say, the Viola 16' stop to the maximum, it will not be louder than the Principal 16' at its default volume. Timbre color facilitates finding stops that have a certain sound quality (see below).
The Werks (i.e., manuals and pedal) are organized in blocks that contain all their stops. Double-clicking on the head of a block enlarges that block for better viewing and editing. The other Werks are downsized accordingly and only show their stop numbers.
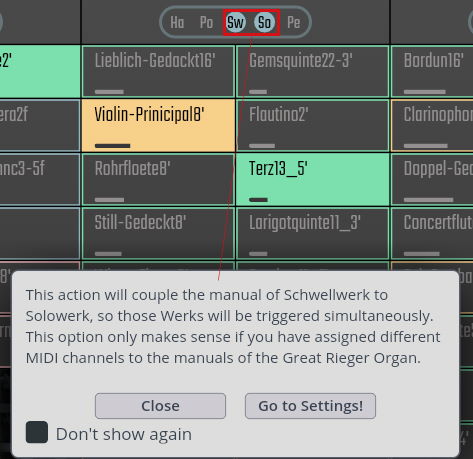
Manuals and pedal are hard-wired to their individual channels and can be coupled with other Werks by clicking on the respective button. A message will inform you to check your channel assignments in Settings –> Engine.
Shift-click will copy the current state to all combinations of the active bank,Shift+Cmd/Ctrl-click copies the current state to all banks and combinations.
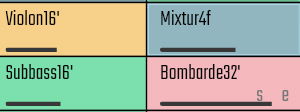
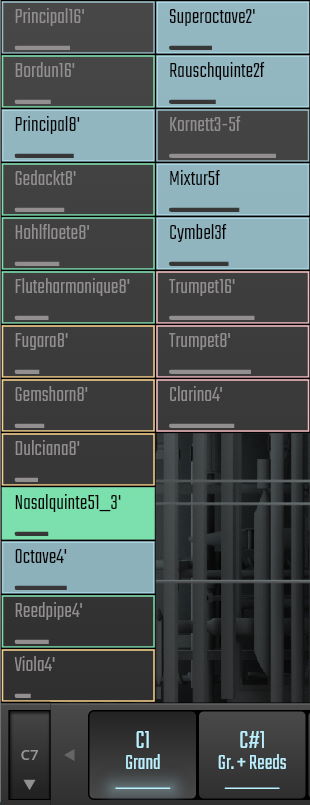
The individual stops are shown in subdued colors when inactive and highlighted when active. The color of a stop associates it with a certain timbre, meaning that stops of the same color belong to the same family of tone colors. Blue = principals (the main pipe organ sound); green = flutes; pink = reeds; orange = strings.
Tip
You can activate or deactivate several stops in a row by swiping (clicking and dragging) the mouse across the stops you want. All stops covered in a swipe assume the state of the first one clicked.
The combination banks contain the preset's different combinations in 12 groups with up to 12 elements each. Click on the left-hand bank button's arrows to step through banks, right-clicking will allow you to select chromatic or white note keyswitches, program changes, or MIDI CC as controllers.
Stepping arrows: Like the stepping keys mapped on the virtual keyboard, clicking on these arrows will step through the bank’s individual combinations.
Combinations: The bank's active combination button is highlighted.
Shift-clicking on a combination button will save the current combination of stops to it. Octave and manual coupler settings are saved together with combinations.The coupler switch allows you to couple the notes played with sub-octave and octave so that the lower and/or higher octaves will automatically be added to the note played. Click on the "+1/-1" to add the respective octave. If both are activated, a "0" appears between the two which you can click to activate/deactivate the middle voice.
Clear button: Clears/disables all stops of the active combination.
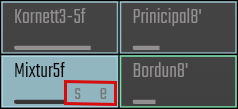
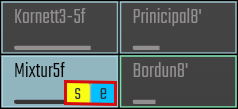
If you hover over a stop, two letters will light up. Click on "s" to solo that stop, and "e" for editing. In case the browser/edit area is hidden, it will open up when you click on edit. The letters will be highlighted as long as a stop is soloed or being edited. Like the stops' active status, you can also activate/deactivate solo and edit by swiping with the mouse.
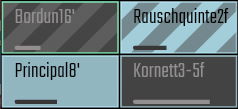
Alt/Option-clicking on a stop allows you to set it to an "ignored" state, indicated by transverse stripes. When loading a combination with ignored stops, these will stay in their previous state, whatever it may be. This means that if a deactivated stop is set to "ignored" and you switch to another combination where that stop is activated, then switch back again, it will be "ignored" and stay activated. This allows you, e.g., to prepare combinations affecting only the Hauptwerk, leaving all the others unchanged, which may come in handy when playing live and improvising. Likewise, Alt/Option-clicking on the header of a werk will cause all its stops and manual couplers to be "ignored", and you can also Alt-click individual coupler buttons to set these to an ignored state. If you have deactivated “auto-save combinations”, always make sure that you save combinations with "ignored" stops manually by shift-clicking on the combination button.
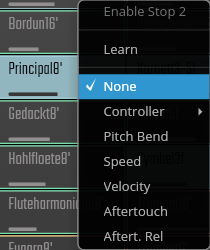
Stops can be assigned individual controllers by right-clicking on them, and as with other controllers, you can also apply the MIDI Learn function. If you set a stop to "Learn", it will flash red.
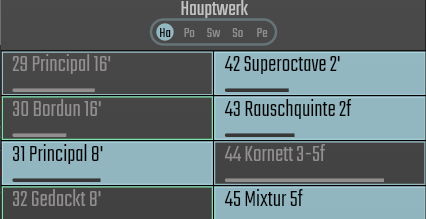
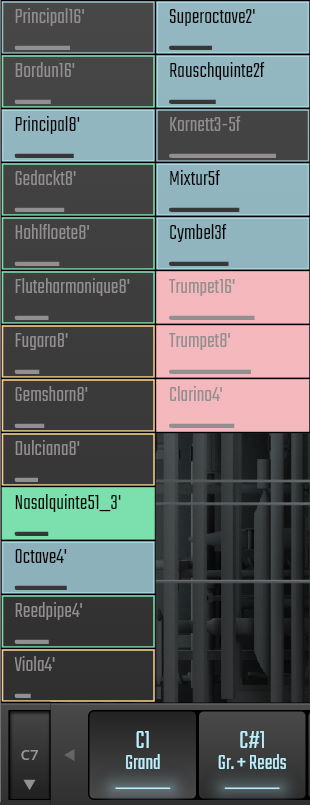
By hovering over the combination buttons under the manual/pedal display, their respective active stops will be shown in advance, so that you do not have to click on a combination without knowing what's in it. Also, the display will overlay that of the active combination and thus allow you to compare two combinations – stops that are active in both will remain highlighted, stops missing in the active combination will be shown with grey instead of black lettering, and stops missing in the second combination are displayed in a darker color. Here's a comparison of the two states: the first image shows the active combination, and in the second image you can see two highlighted combination buttons (bottom right) and the different coloring of stops according to whether they exist or don't exist in one of the two combinations.
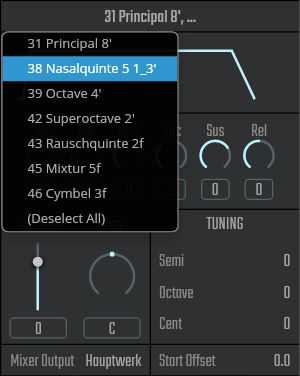
By clicking on a stop's "e" letter, that stop is loaded in the right-hand edit area. You can also mark more than one stop for editing. A click on the edit heading lists the names of the selected stops, where you can deselect individual stops by clicking on their name. If no stop is selected, the heading switches to "Edit all enabled stops".
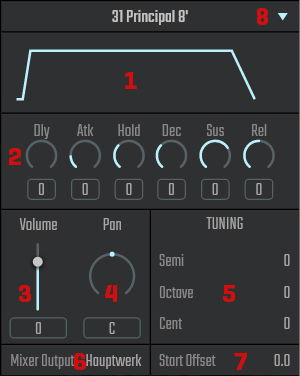
The stop's envelope graph. If you hover over it, the handles of the individual values will appear, which you can drag to change the corresponding value.
The envelope parameters. Drag the circular or the numerical display, double-click to enter a value, and
Cmd/Ctrl-click to set it to zero.Delay sets an interval before the attack phase sets in. Value: 0 to +1.
Attack defines the time it takes until the tone reaches its peak level. Value: -2 to +10.
Hold is the time the attack level is held before the decay phase sets in. Value: -1 to +2.
Decay sets the time it takes to go from attack level to sustain level. Value: -1 to +2.
Sustain is the level after the attack phase, on which the tone stays as long as the key is held. Value: -inf to +6 dB.
Release is the time it takes for the tone to subside after the key is released. Value: -5 to +5.
Volume sets the stop's overall volume (relative to its intrinsic volume). Changes will show up in the stop’s relative volume indicator, where red signifies lower and blue higher volume.
Pan defines the distribution of the signal in the stereo field.
Tuning can be used either to change a stop's positioning on the keyboard with the Semi and Octave parameters or to micro-tune it using the Cent parameter.
Tuning can be used to define settings for REGULAR and SPREAD. Basically, the two states represent different stop settings with regard to these octave/semitone transposes, including keyboard range adaptions indicated by blue markers on the GUI keyboard which can be dragged to define a different play range. If you are in regular mode and change one or more stop transpose settings, then switch to spread mode, the settings you made in regular will be saved in the "regular" data, and the data of "spread mode" will be applied.Mixer output allows you to change the stop's audio channel routing. Not available for multi-microphone recordings, where the mixer channels represent the various microphones.
Start offset sets the sample start offset in milliseconds. Any value above 0 will skip the corresponding first part of the played sample. Value: 0 to 1,000.