There was quite some change to the CUBASE threading model since Cubase 7. This causes issues with a variety of plugins. Audio Input behaves very badly due to this change. In Cubase 8 and higher, you should deactivate ASIO GUARD 2 manually:
[Menu] > Devices > Plug-in Manager > VST Instruments > Vienna Ensemble Pro > Click "i" for Plug-in information > Click to set ASIO Guard to Inactive.
Please perform this operation on ALL VEPro Instrument and Fx plugins. Audio Input plugins will work properly thereafter.

Start the Vienna Ensemble Pro SERVER.

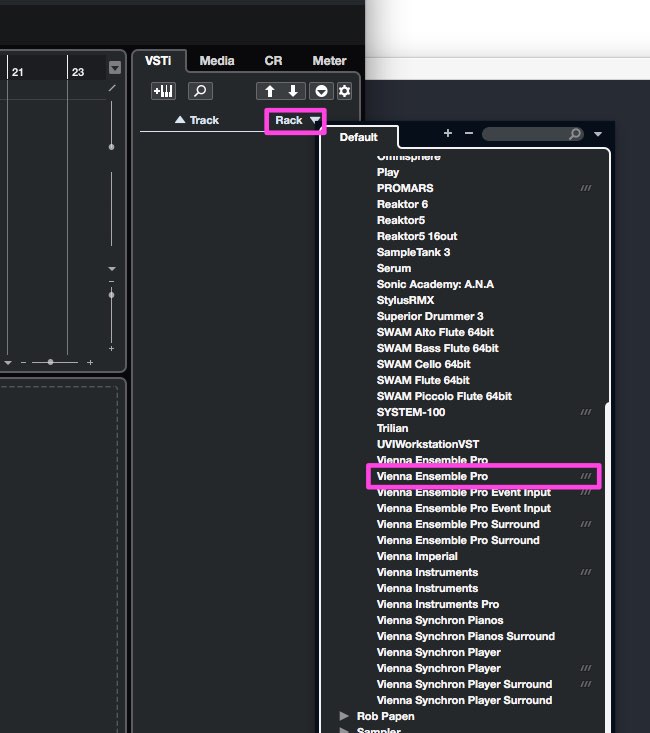
Instantiate Vienna Ensemble Pro as a VST or VST3 Instrument (///), ideally as a RACK instrument.

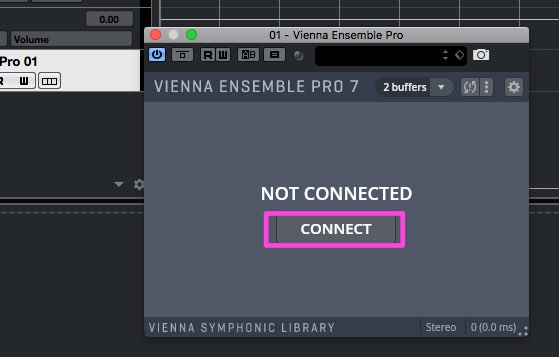
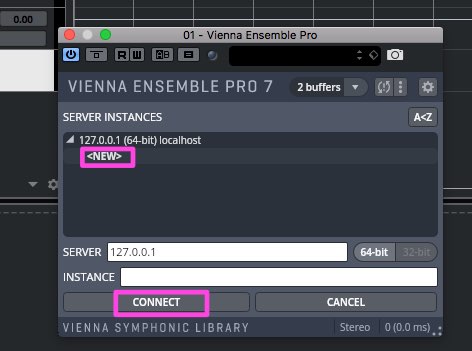
The Vienna Ensemble plug-in opens up – click "Connect" and choose the Vienna Ensemble Pro instance of your choice (remember that you have to start the Vienna Ensemble Pro SERVER first!).
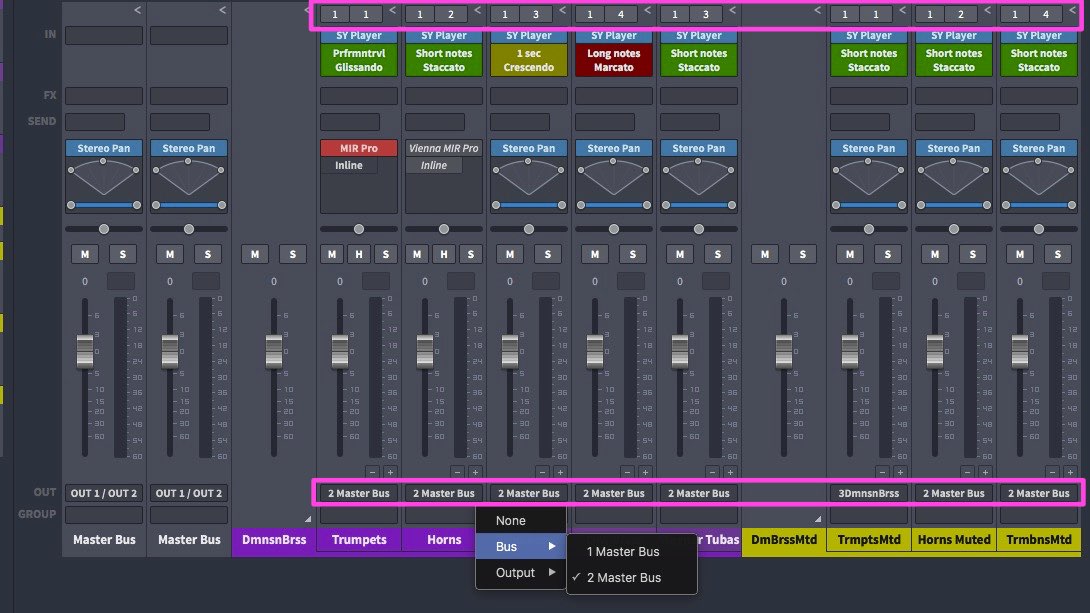
- Click on the sign to the far right of "Vienna Ensemble Pro" to activate the available Vienna Ensemble Pro outputs. You can activate them separately or one by one, depending on how many you need.
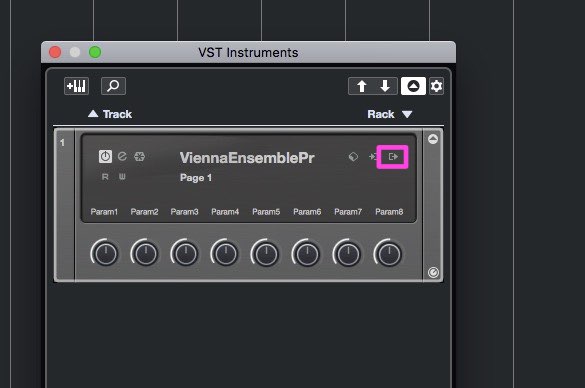
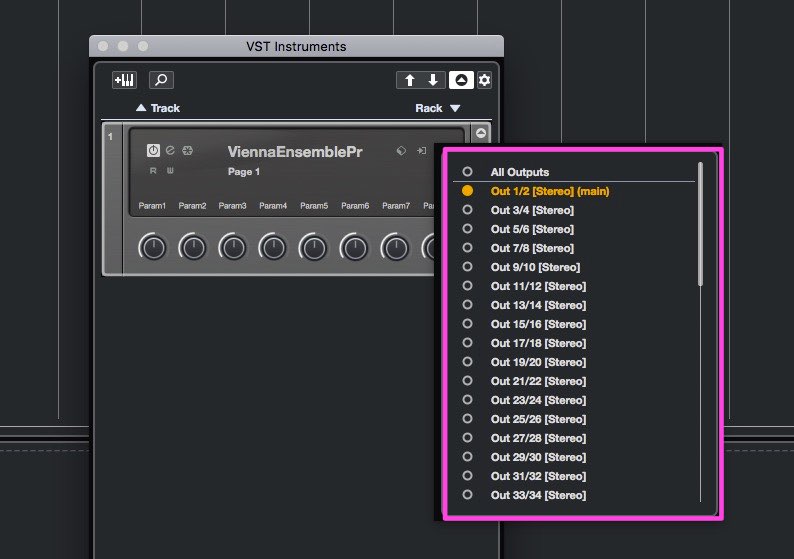
- The corresponding stereo channels will be created automatically in your mixer.

- Assign the different outputs in Vienna Ensemble Pro. It is also possible to assign the outputs below the fader of each channel.

Important
This chapter applies to LOGIC in combination with Audio/Event Input Plug-ins
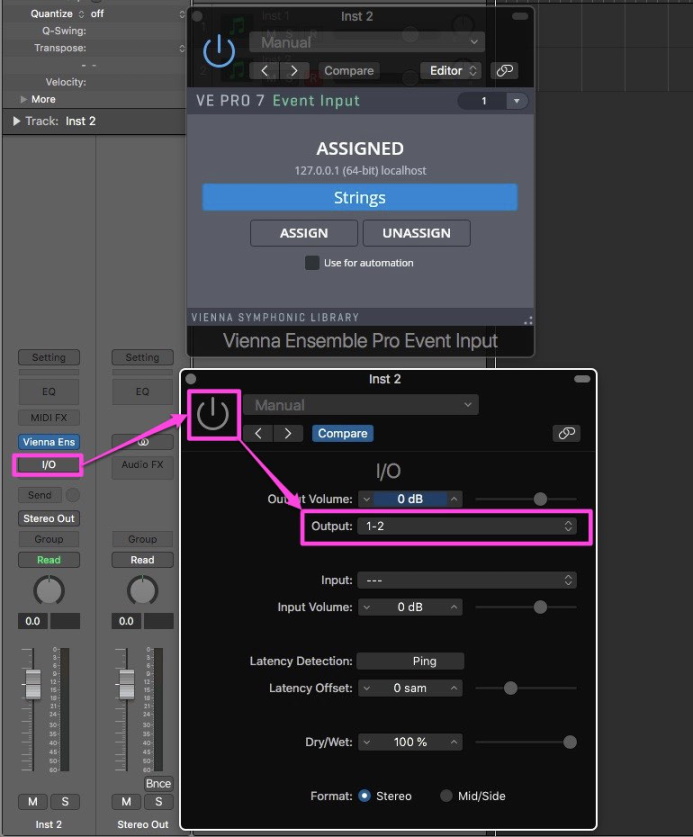
For proper functionality when using the Audio/Event Input plug-ins in Logic, both the channel that has the main Vienna Ensemble Pro Plug-in and the channels that have an Audio/Event Input Plug-in must be forced into Logic's "Live" mode.
How to force a Logic stereo channel into "Live" mode:
Add an insert effect: Utility => I/O
Enable its output
Bypass it
Note
Logic channels that are in "Live" mode as well as the channels connected to them will run their processing tasks on a single CPU core.
If you are using Parameter Automation in Logic: Preferences -> Audio -> General -> "Sample Accurate Automation" needs to be set to "Off" or glitches will occur:

To accelerate the creation of your new templates with the Multiport Template for Logic Pro X and with the new MAS version for Digital Performer, you can use the MERGE function in Vienna Ensemble Pro’s FILE menu.
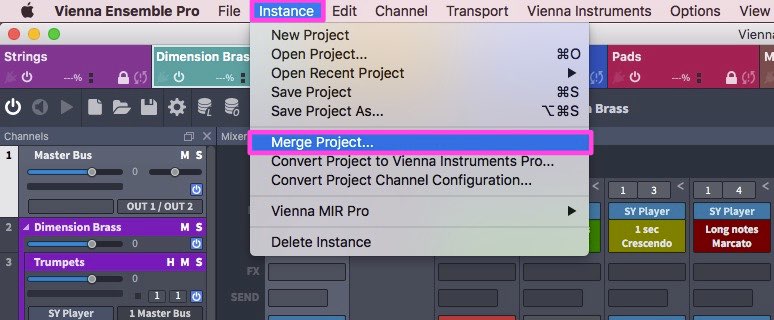
Merge any existing project and choose from the available import options:
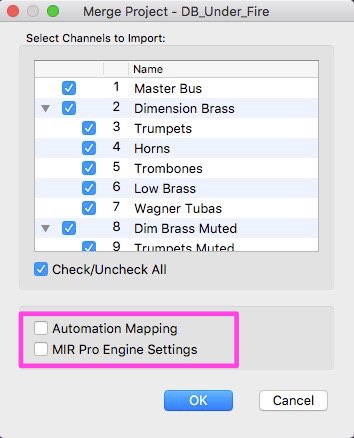
After you have merged your projects, please assign the appropriate MIDI ports and MIDI channels as well as the Output configuration.
By using the possibilities of the Logic Environment, we found a way to provide you with multiple MIDI input ports per instance, as well as the ability to automate parameters from the Vienna Ensemble Pro Plug-in without using the Event Input plug-in.
This system avoids "Live" mode and the automation workarounds mentioned above, provided no Audio Input plug-ins are used.
Important
The Multiport Template works best in Logic Pro X 10.1 or higher, as in this version an internal buffer in Logic Pro X was multiplied, reducing the risk of dropped or hanging notes to a minimum.
Start the Vienna Ensemble Pro SERVER.
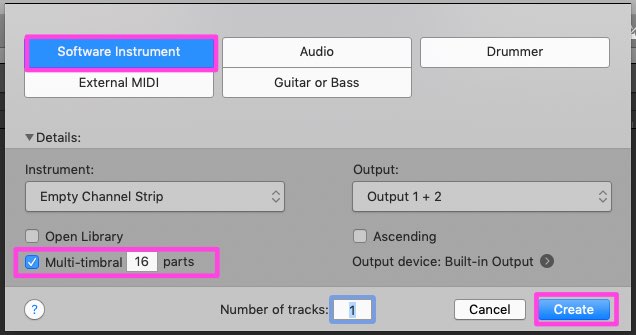
Then, instantiate a multi-timbral Software Instrument track:
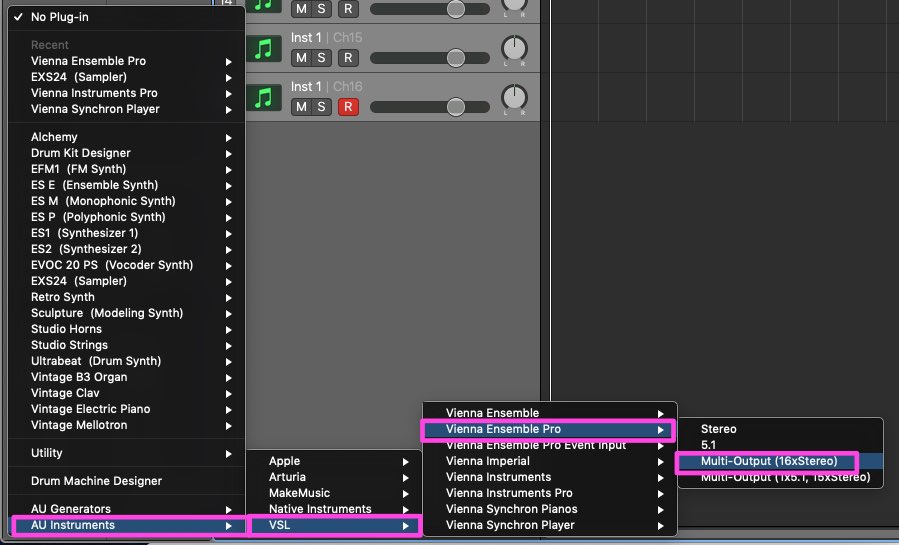
Assign Vienna Ensemble Pro (Multi Output).
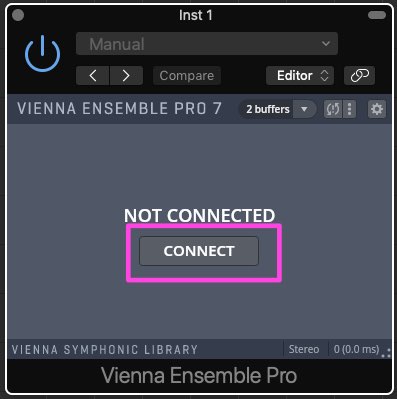
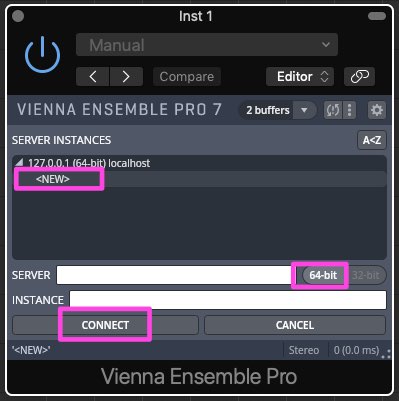
The Vienna Ensemble Pro Plug-in opens – click "Connect" and choose the Vienna Ensemble Pro instance of your choice..
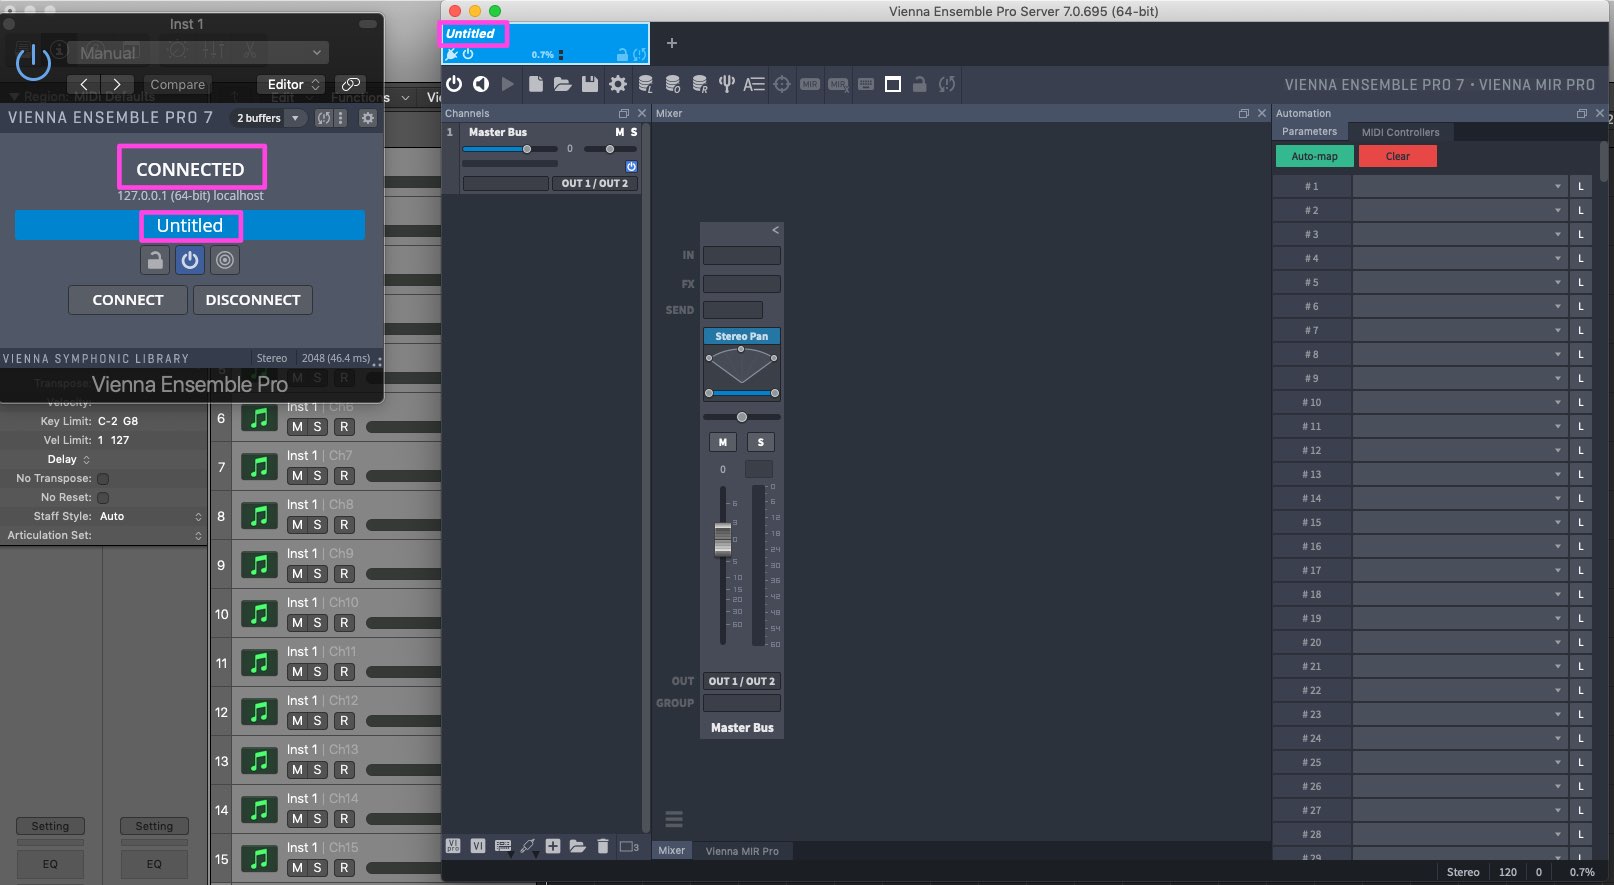
The windows you see now are the Vienna Ensemble Pro Plug-in and the Vienna Ensemble Pro Server.
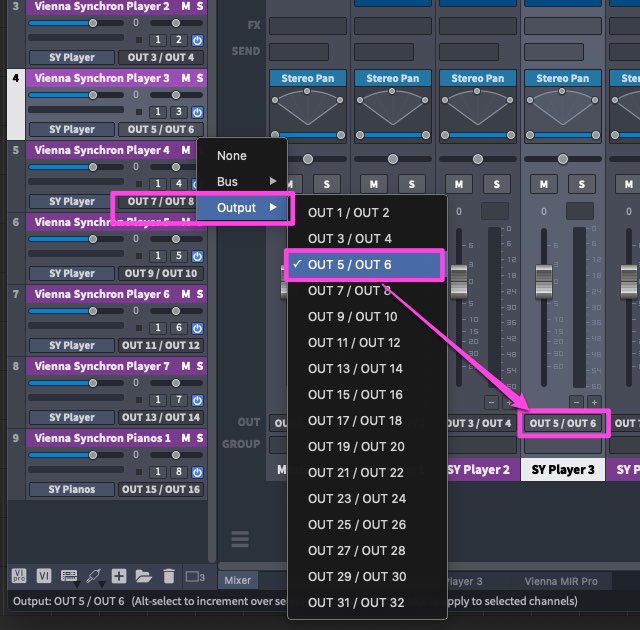
Now you can assign different outputs in Vienna Ensemble Pro. It is also possible to assign the outputs below the fader of each channel.
In Logic Pro X, open the Mixer page. Outputs 1–2 are automatically assigned in the Audio Instrument channel.
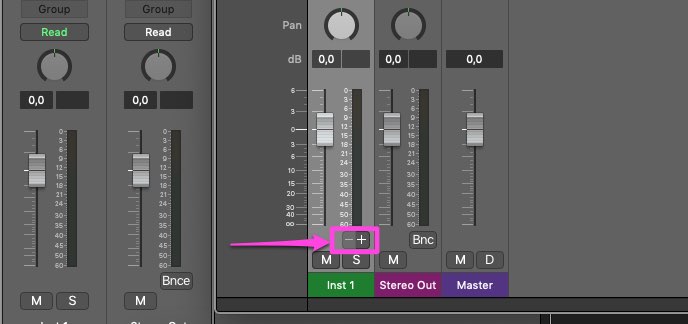
You can add more stereo channels in ascending order comfortably by simply clicking the "+" Button underneath the SOLO button in the Instrument channel.
Start Pro Tools and the Vienna Ensemble Pro SERVER.

- Then, create a Stereo Instrument track.

- Assign Vienna Ensemble Pro as a multi-channel plug-in.

- The Server Interface appears – click "Connect" and choose a Vienna Ensemble Pro instance.
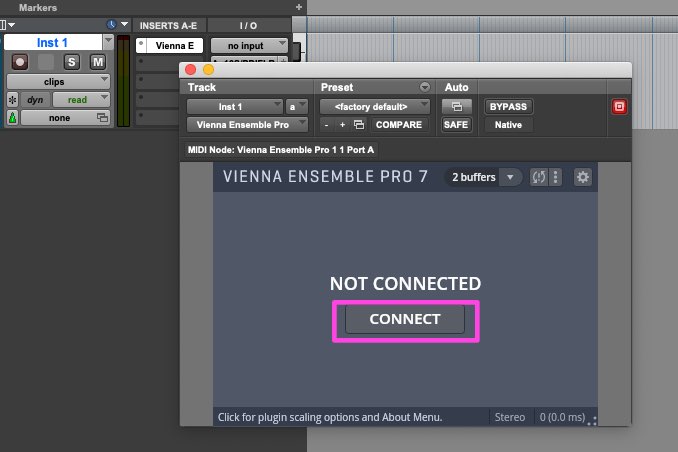
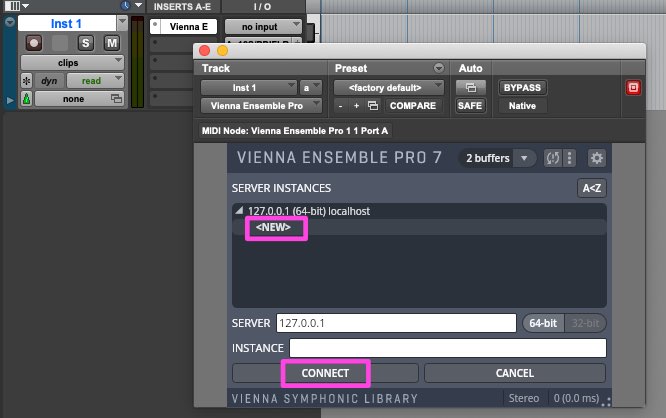
- Vienna Ensemble Pro will launch in the background. You see the Vienna Ensemble Pro Plug-in and the 64-bit Vienna Ensemble Pro Server.

- Create new MIDI tracks as needed. With AAX, the amount of MIDI ports can be set in the Vienna Ensemble Pro Server Preferences.

- In the mixer, assign the MIDI channels to Vienna Ensemble Pro.

- Now, create an Aux track and as many Stereo Aux Inputs as you will need.

- Assign the Vienna Ensemble Pro outputs to the inputs of your Aux track.

- Assign the different outputs in Vienna Ensemble Pro. It is also possible to assign the outputs below the fader of each channel.

Launch the Vienna Ensemble Pro SERVER so that it is ready for you to connect to.

Create a new Vienna Ensemble Pro instance by dragging and dropping the desired instrument from the instruments menu on the right to the arrange window on the left:
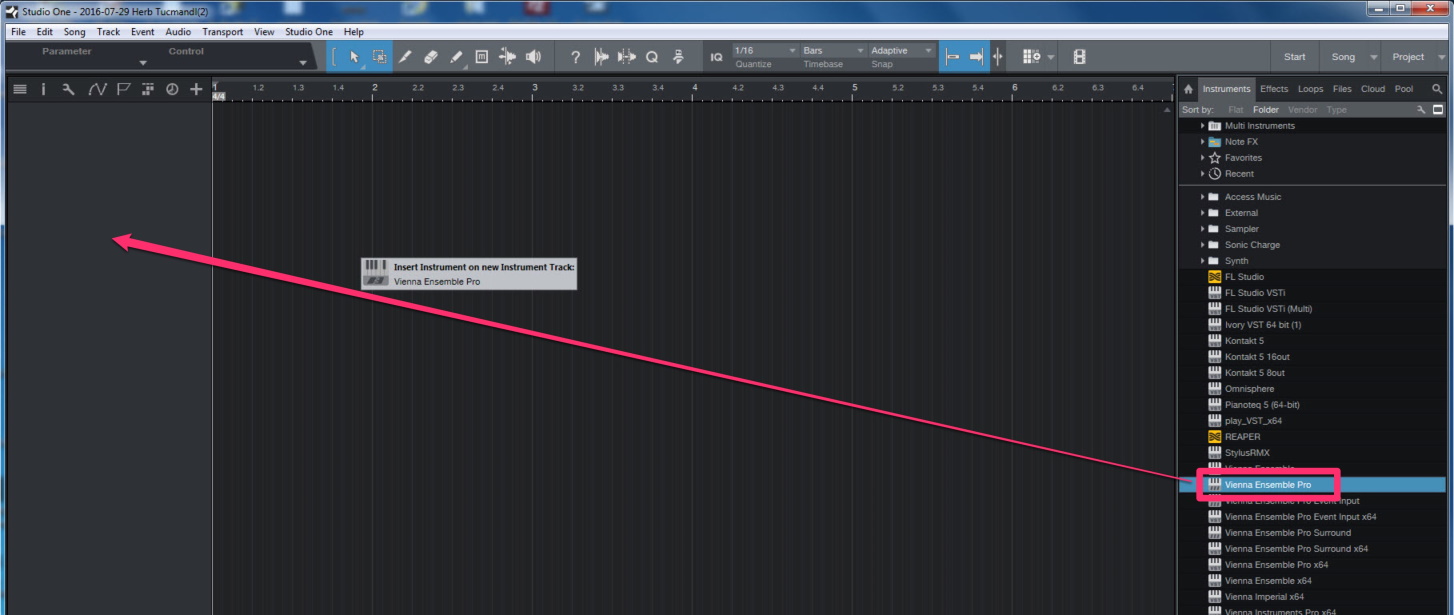
The Server Interface will appear – click"Connect" and choose a Vienna Ensemble Pro instance.

Vienna Ensemble Pro will launch in the background. You will see the Vienna Ensemble Pro Plug-in and the Vienna Ensemble Pro Server itself.

Create as many MIDI (instrument) tracks as you need in Studio One.

Open the mixer page. Outputs 1–2 are automatically assigned to your Vienna Ensemble Pro instance. You can expand these available outputs by clicking the down arrow on Vienna Ensemble and choosing "Expand". If you want to use only a single stereo channel in Studio One and mix the instruments inside Vienna Ensemble Pro, everything should be routed to the output pair 1/2 inside Vienna Ensemble Pro. In this case, you can leave out steps 7 and 8.


Now you can click on all the available 32 outputs and choose the ones you need. As you click the boxes to add outputs, channels are automatically created for you in the mixer window:

Now when you assign outputs in the Vienna Ensemble Pro instance, they will be routed to these channels in Studio One’s Mixer:

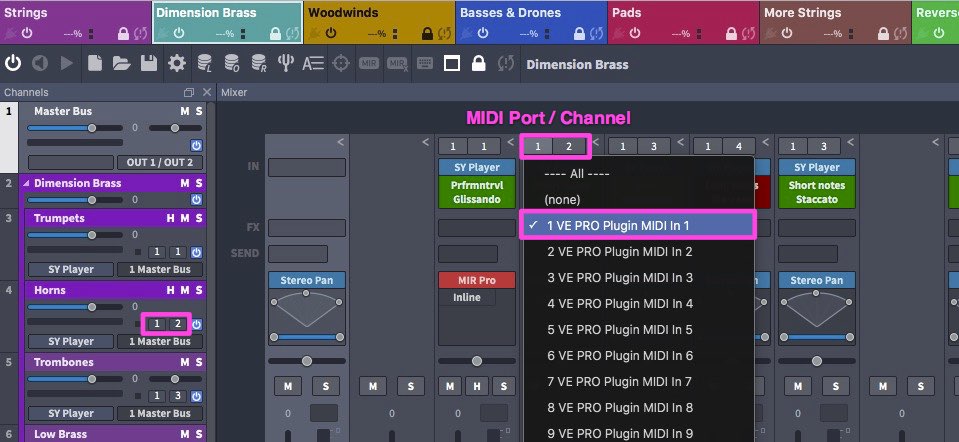
Now you need to assign MIDI outputs, ports, and channels to the tracks in your arrangement.

Finally, set the same MIDI ports and channels in your Vienna Ensemble Pro instance:

Your environment is ready to go! You should now have complete synchronization between Studio One and Vienna Ensemble Pro.
Your newly installed Vienna Ensemble Pro MAS plug-in enables you to utilize multiple MIDI ports with each instance of Vienna Ensemble Pro.
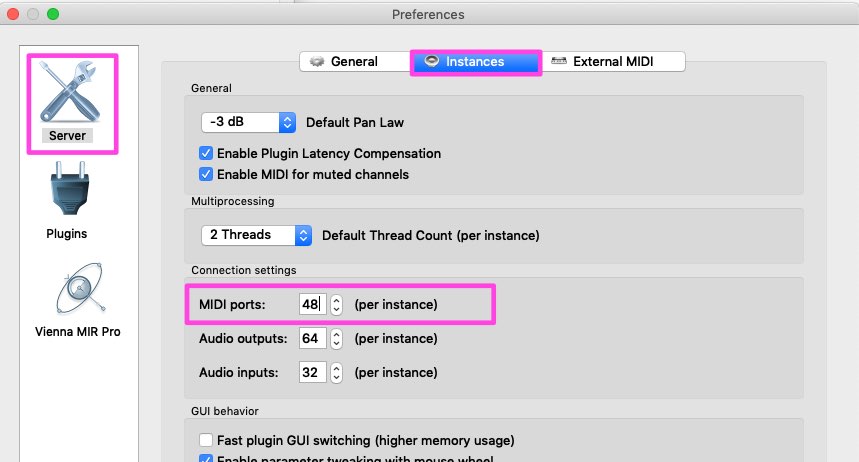
- Assign multiple MIDI ports in the Vienna Ensemble Pro Server Preferences:
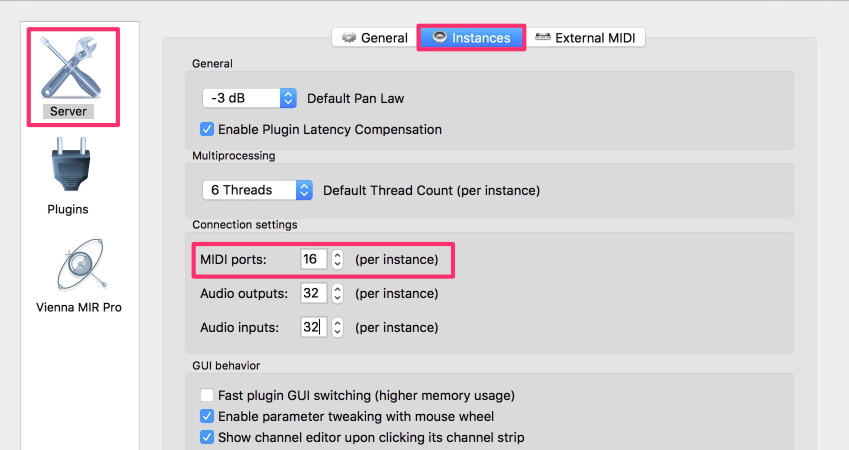
- Choose Project > Add Track > Instrument with Options:

- Choose the configuration you need from the MAS plug-in list:

- Connect to the VE Pro Server of your choice:

- Add more MIDI Tracks, if you like, and assign any MIDI channel from the available Vienna Ensemble Pro MAS MIDI ports and MIDI channels. Do the same in Vienna Ensemble Pro.

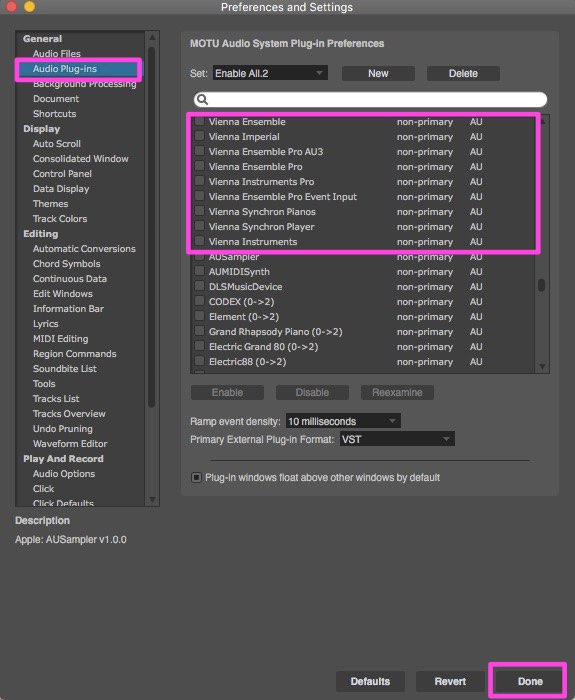
To migrate from existing AU/VST Digital Performer projects to MAS projects, uncheck the AU and VST items in the plug-ins list you find in the Digital Performer Preferences > General > Audio Plug-ins:
Vienna Ensemble Pro
Vienna Ensemble Pro Audio Input
Vienna Ensemble Pro Surround
Click Done and all Vienna Ensemble Pro AU/VST Server Interface plug-ins will automatically be replaced with the MAS plug-in version.
Tip
To take advantage of the multiple ports available with MAS, you can now merge multiple VE Pro instances into one instance.
Bouncing (offline rendering) does not work when using Audio Unit Event Input or Audio Input plug-ins, but Freezing (real-time rendering) works fine. As a workaround for straight bouncing it is possible to freeze first and then bounce the resulting frozen tracks.
Important
This only applies when using the Audio/Event Input plug-ins in Digital Performer. For regular operation, Vienna Ensemble Pro 7 works as expected, especially when using it as a MAS plug-in with Digital Performer 8 or higher.
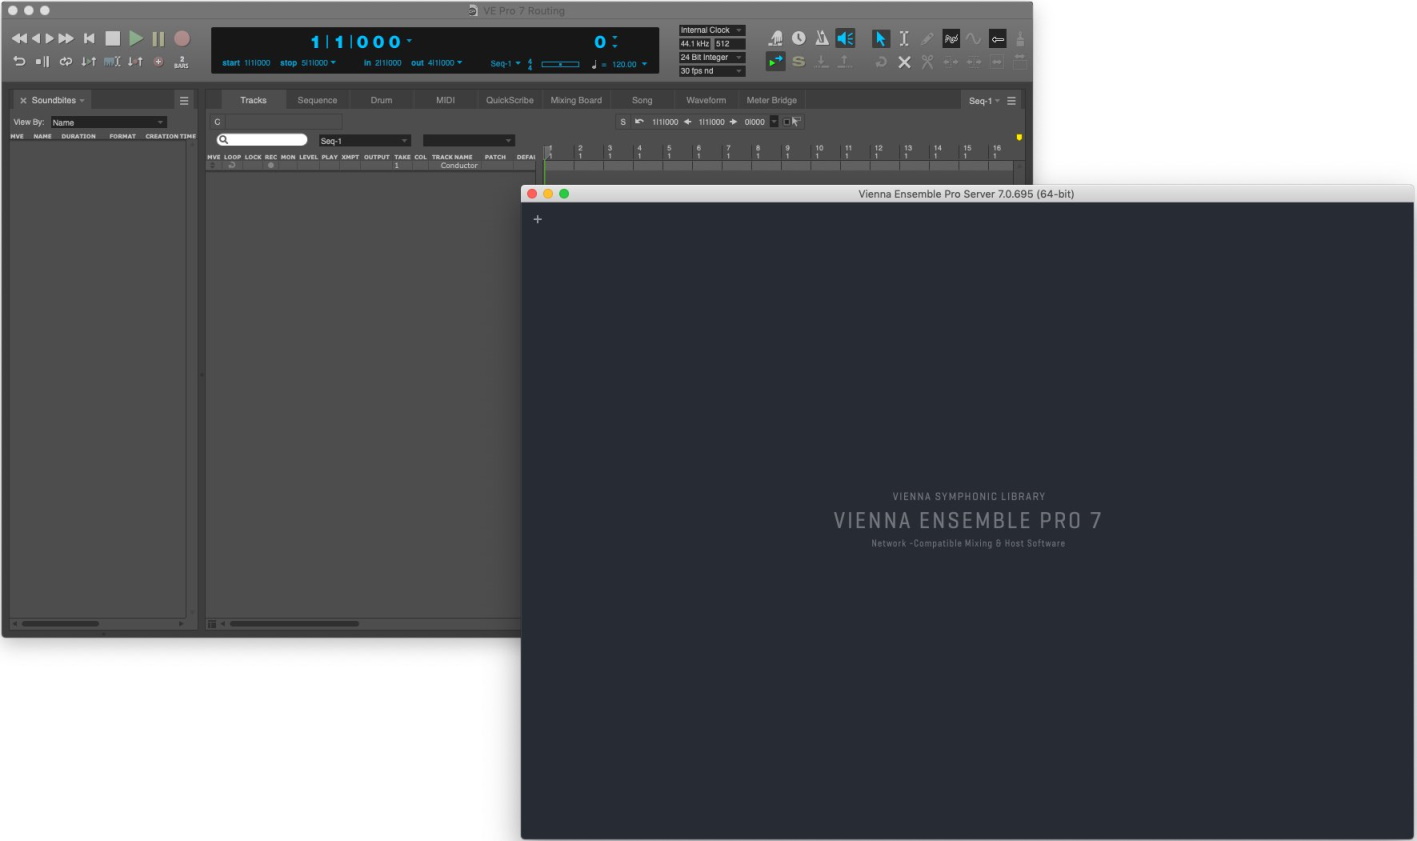
Launch Digital Performer and Vienna Ensemble Pro Server.
- Add a new Instrument Track with Options.

- Assign it to Vienna Ensemble Pro (stereo)

Add 16 MIDI tracks. If you are using VE Pro as a MAS plug-in in Digital Performer 8, you can get up to 768 (48 x 16) MIDI channels, as you can use up to 48 MIDI ports per instance, depending on your settings in the VE Pro Preferences!

- Click on OK – this is will bring up the Vienna Ensemble Pro Plug-in.

- Click on Connect, select a Server IP from the list of available servers, and confirm the connection.
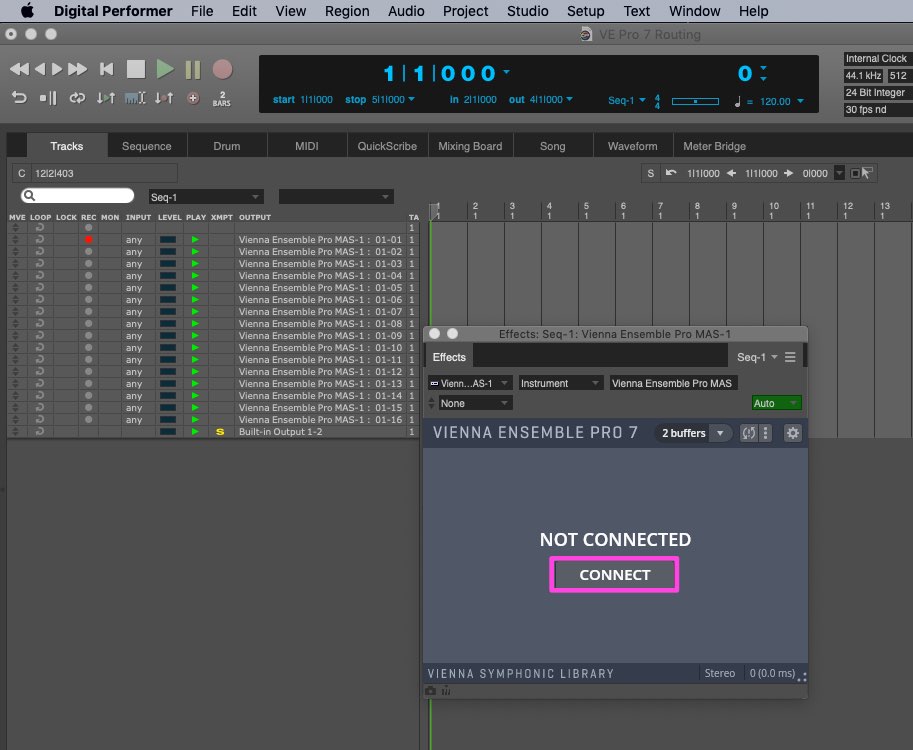
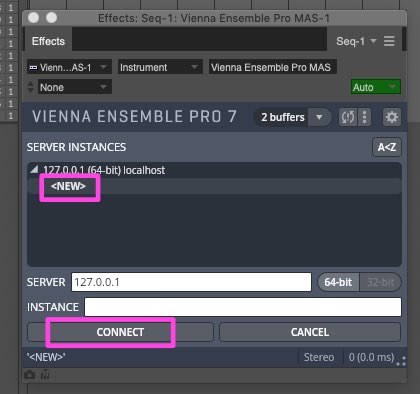
- The windows you will see now are the Vienna Ensemble Pro Plug-in and the Vienna Ensemble Pro Server. Create Instrument Channels in Vienna Ensemble Pro and assign MIDI channels to them.

- Add one or more auxiliary tracks to your project.

- You can now check the available Stereo Outputs of Vienna Ensemble Pro in the inputs of your Aux Track.

- Assign the different outputs in Vienna Ensemble Pro. It is also possible to assign the outputs below the fader of each channel.

Start Vienna Ensemble PRO SERVER.

- Instantiate Vienna Ensemble PRO into an empty MIDI track.

- Vienna Ensemble Plug-in opens up – Click "Connect" …

...and choose the Vienna Ensemble PRO instance of your choice. Remember that you have to start the Vienna Ensemble PRO SERVER first!

The most effective and at the same time, the easiest use of VE Pro in Ableton Live can be achieved by employing the "External Instrument" option. Create the required number of channels in VE Pro and adjust the Audio Outputs.

Thereafter, load the respective number of external instruments in Ableton Live – for example, into empty MIDI tracks or with Drag & Drop into the Mixer Drop Area.

- Now you have to adjust the routing of the External Instrument in Ableton Live: First, select the Vienna Ensemble Pro instance in the "Midi To" area in the respective External Instrument.

Then choose your "target channel" in the appearing field.

Now you can choose the desired output in the subjacent "Audio From" area.

The External Instrument allows the user to send MIDI Signals into VE Pro and receive the resulting audio signal in the same channel. Consequently, no additional audio channels are necessary to hear the signal.

- Repeat the same process for every additional channel, just with the desired settings for "MIDI To" and "Audio From".

Launch the Vienna Ensemble Pro Server so that it is ready for you to connect to.
Create a new Vienna Ensemble Pro Instance by selecting"InsertSoft SynthVST3" in the top menu bar. Please note that the exact plugin folder name may differ depending on where Vienna Ensemble Pro is installed.

The following dialog will appear. Depending on whether you wish to have multiple outputs (for mixing instruments inside SONAR) or a single stereo output (for mixing instruments inside Vienna Ensemble Pro), please choose the appropriate option as well as the option to display the"Synth Property Page", and click OK.

The Vienna Ensemble Pro Plug-in will appear – click "Connect" and choose a Vienna Ensemble Pro instance.


Vienna Ensemble Pro will launch in the background.
Now when you insert buses and instruments, and assign outputs in the Vienna Ensemble Pro instance, they will route to the previously created tracks in SONAR. For using only a single stereo track in SONAR, everything should be routed to the output pair 1/2 inside Vienna Ensemble Pro.

You will need to insert MIDI tracks (as many as you need) into the SONAR project. To do so, please select"Insert>Multiple Tracks":

Please set the audio track count to 0 and the MIDI track count to as many tracks as you need to create. ‘Port’ should be set to display the previously inserted Vienna Ensemble Pro synth instance.

For the newly inserted tracks, you will need to pick MIDI channels. Please select"I/O" in the track options display first.

If the view is shorter than in the picture below and doesn’t show MIDI channel [C] combo boxes, then please resize it horizontally to make it wider. After this, select the desired MIDI channels. Here, channels 1 …16 were selected for the MIDI tracks.

- Finally, route the proper MIDI channel from the Vienna Ensemble Pro instance to SONAR:

Your environment is ready to go! You should have complete synchronization between SONAR and Vienna Ensemble Pro. If you need to repeat these steps too often, we recommend saving the above setup as a starting point and using it as a project template.
For Sibelius users, it is now possible to have all loaded instruments in one Vienna Ensemble Pro instance, even if more than 16 instruments and different sound sets are used in one Sibelius playback configuration.

Any additional Vienna Ensemble instances that might have been needed previously, can now be substituted with the Vienna Ensemble Pro Event Input Plugin, which delivers up to 31 additional MIDI ports with 16 channels each.
All instruments are routed to the same Vienna Ensemble Pro instance now. MIDI ports have to be set up in Vienna Ensemble Pro for every instrument, which was not necessary for Sibelius users previously, as there simply was only one available port. Sound sets and the settings on the Manual Sound Sets page have to be configured in the same way as before.
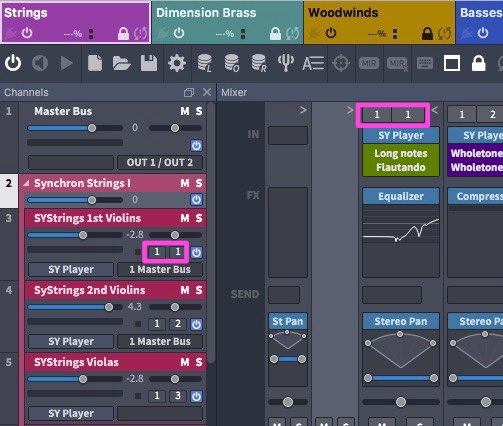
For further details on how to set up Sibelius and Vienna Ensemble (Pro), please refer to the manual "Optimizing Sibelius Playback", which can be downloaded from MyVSL.
On this page
- Digital Audio Workstation
- Cubase
- Cubase ASIO Guard
- Routing in Cubase
- Logic Pro
- Logic's "Live" mode
- Automation in Logic
- Merging existing VE Pro projects (*.vep files)
- Multiple MIDI ports in Logic Pro X – a different approach
- Routing in Logic Pro X
- Pro Tools
- Presonus Studio One
- Digital Performer
- Multi MIDI ports with MAS Plug-ins
- Quick Guide – Migration to MAS
- Audio Input / Event Input plug-ins
- Routing in Digital Performer
- Ableton Live
- Cakewalk SONAR
- Sibelius


