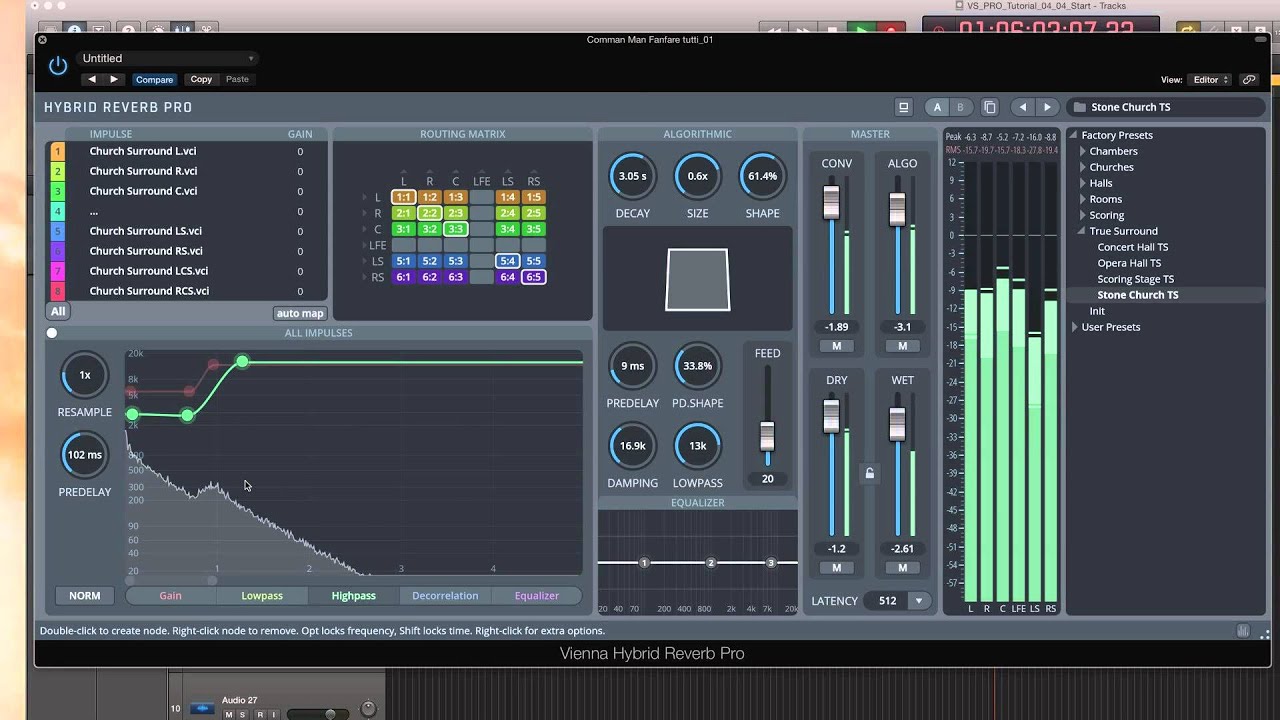
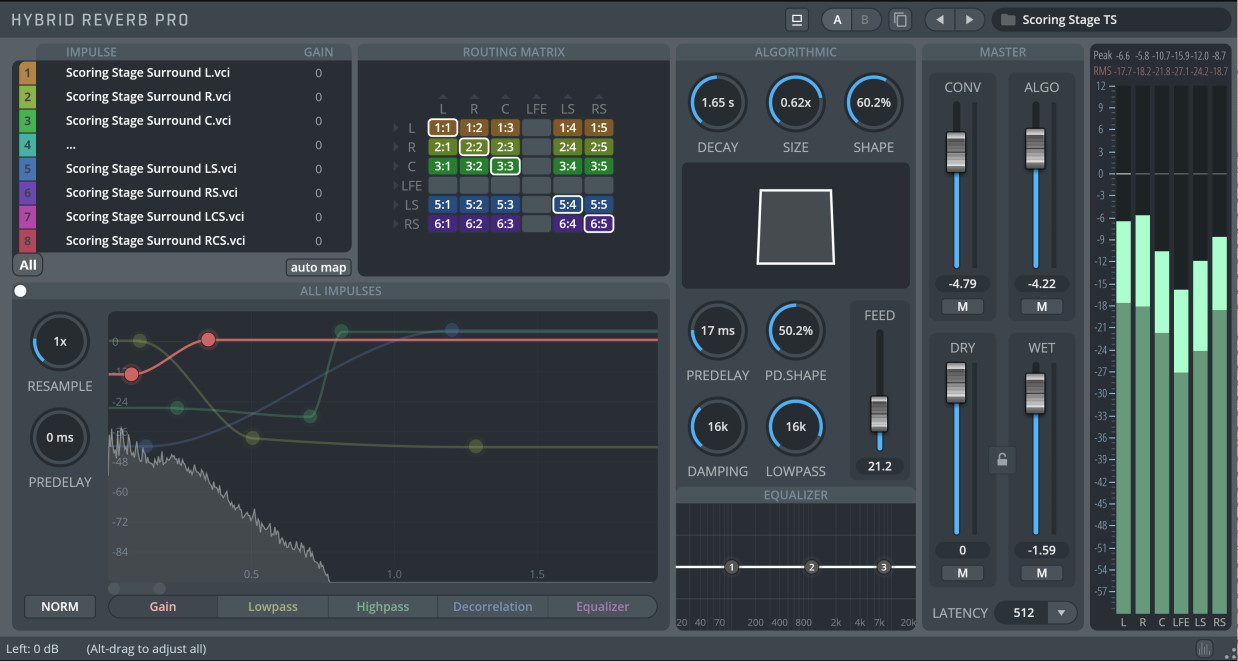
The Hybrid Reverb Pro combines the natural versatility of convolution impulses with the vivid, larger-than-life reverb tail of an algorithmic reverb. You get the best of both worlds, which helps you sculpt the much sought-after contemporary sound that is the ideal of today's mixing standards.
We have provided many starting points from multiple preset variations that let you dig deeper into the secrets of modern reverberation.


Select and assign impulse response files. Select 1-8 or A (ALL) to display the impulse response in the Impulse Waveform Display below.
Click the impulse name or the folder button to the left of the impulse list to load different impulse response files.
GAIN: Adjusts the volume of the selected impulse response. All level changes are indicated in dB in relation to the unchanged original volume envelope of the IR.
auto map: Automatically maps impulse channels to the ImpulseRoutingMatrix upon load.
Routing Matrix Window: Impulse Selection for Routing Matrix.
Alt/Option-clickand select an impulse channel to auto-fill cells to the right of the current cell.Right-clickcell to feed the dry signal into the algorithmic engine (will add a white frame to the cell).
The menu represents channels inside of the source impulse. All factory impulses were created with 8 channels.
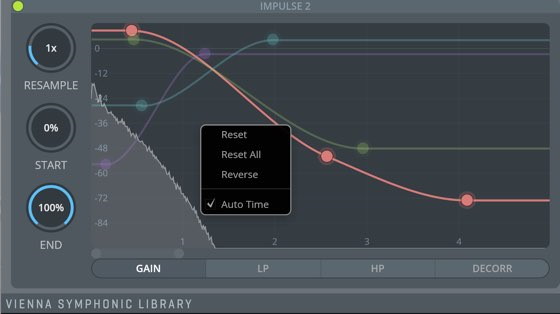
Displays the waveform of the impulse response selected in the Impulse Window. Set the envelopes of the impulse for GAIN, LP, HP and DECORR. All manipulations are non-destructive and the waveform of the impulse is adapted automatically.
If A (All) is selected in the Impulse Window, the adjustments will affect all loaded impulse responses.

RESAMPLE: Resample the selected impulse response (0.25-4 times resampling) to change the length of the impulse response.
START: Moves the starting point of the impulse response sample(displayed in % of the impulse length). One could say that the left border of the IR is moved towards the middle. This is useful for getting rid of any unwanted silence built-in to the IR, or to adjust the length of the impulse.
END: Moves the endpoint of the impulse response sample(displayed in % of the impulse length). One could also say that the right border of the IR is moved towards the middle so that the tail of the IR gets shortened. This can be useful for special effects.
PREDELAY (only available if ALL is selected: The amount of time (in milliseconds) between the dry signal and the onset of the convolution reverberation.
NORM (only available if ALL is selected): Normalizes the Impulse Gain of all loaded impulse samples(frequency domain normalization). Helpful after processing impulses (Gain/LP/HP/Decorr).
GAIN: Adjusts the Volume Curve of the impulse response.
LP: Adds a low pass (i.e., high-cut)filter to the impulse response. Values are indicated in Hz.
HP: Adds a high pass (i.e., low-cut)filter to the impulse response. Values are indicated in Hz.
DECORR: Adjusts the amount of decorrelation used on the impulse response. Decorrelation enhances a signal's perceived stereo image, and thus the spatial enveloping and broadness of the resulting reverb.
EQ (only available when ALL impulses are selected): 3-band Equalizer that affects all loaded impulses.
Graphic Handles: Double-click anywhere in the Impulse Waveform Display – a new handle will appear for the selected envelope. This way, you can design your own envelopes and shape the room to your liking.
Click All in the Impulse Window to select all loaded impulses.
A right-click in the Impulse Window brings up the context menu, which lets you Reset the selected envelope, Reset All envelopes, Reverse the selected envelope and automatically adjust the visible part of the envelope (Auto-Time).

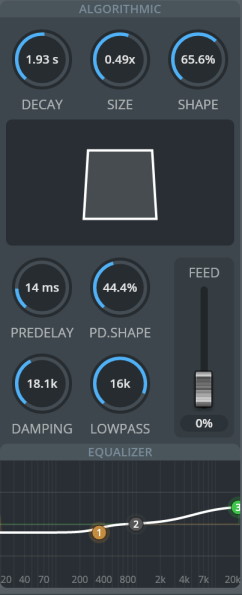
DECAY: Decay Time.
SIZE: Adjusts the room size of the algorithm(displayed below).
SHAPE: The room shape parameter adjusts the geometry of the room; at 50% shape, the geometry is uniform for all speakers. At 100% shape, rear channels will have a much larger geometry than front channels, giving options for tailoring the surround field.
PREDELAY: Algorithmic Predelay. The amount of time (in milliseconds) between the dry signal and the onset of the algorithmic reverberation.
PD SHAPE: Applies an offset for the speakers in the rear(scales the pre-delay value based on the speaker angle).
Full predelay shaping will add a maximum of 30% of the predelay setting to the rear-most channels.DAMPING: High-frequency damping of the feedback path. Values indicated in Hz.
LOWPASS: Adds a brickwall low pass(i.e., high-cut)filter.Values indicated in Hz.
FEED: Adjusts the amount of the convolution signal that is fed into the algorithmic reverb section.
Equalizer Window: 3 bands of equalizer, applied to the dry feed of the algorithmic reverb section.
Filter Response Display: Shows the response curve for the current settings. The (horizontal) frequency range is from 20 Hz to 20 KHz, and the (vertical) amplitude scale displays a range of 36 dB (-18 dB to +18 dB).
Filter handle: Drag this handle to graphically adjust the filter's boost/cut and/or frequency. Double-click to activate/deactivate a filter band.
When adjusting the filter handle,Shiftincreases the precision;Alt/Optionlocks the frequency.Ctrl/Cmd-clickinga handle resets the band to the default settings.Filter Type: Right-click a handle to choose a filter type from Peak, High Shelf, Low Shelf, High Cut, or Low Cut.
Gain: Adjusts the peak gain of the corresponding filter in a range from -18 dB to +18 dB.
Frequency: Sets the center frequency.
Q setting: Adjusts the filter Q of the corresponding filter band from 0.1 to 20. The smallest setting of 0.1 will create a very wide filter, whereas a setting of 20 will give you the smallest possible filter width.
Use the mouse wheel (or pressCtrl/Cmd + click and drag)to adjust the Q setting for the currently selected filter. The given filter handle has to be highlighted.Composite curve: Shows the overall response curve of the current settings in the Filter Response Display.

CONV: The amount of the Convolution signal. The
Mbutton (Mute) below will silence this signal.ALGO: The amount of the algorithmic signal. The
Mbutton (Mute) below will silence this signal.DRY: The amount of the unprocessed signal. The
Mbutton (Mute) below will silence this signal.WET: The amount of the processed signal. The
Mbutton (Mute) below will silence this signal.LOCK (A): Keep dry/wet and mute settings when loading presets. Ideal for comparison.
LATENCY: By default, the plugin has 512 samples latency, but if desired, latency can be adjusted to a lower setting. For certain systems, a higher latency setting is preferable at very low latencies of your soundcard, such as 64 or 128 samples. In general, the higher the latency, the lower the CPU usage. It is NOT recommended to use latencies lower than the buffer size. This will lead to excessive CPU usage.