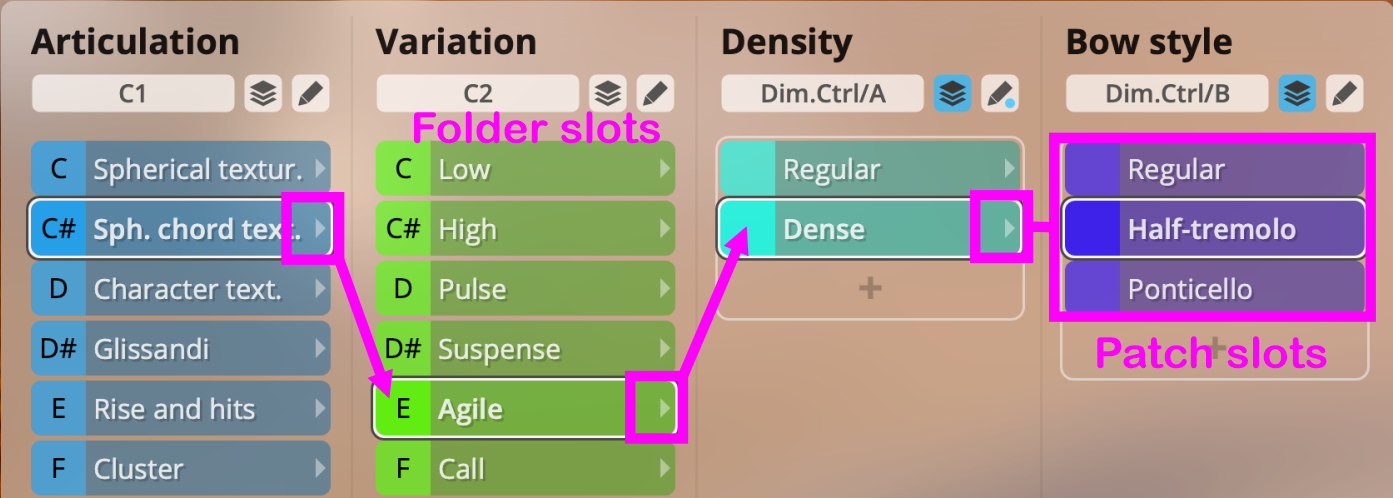
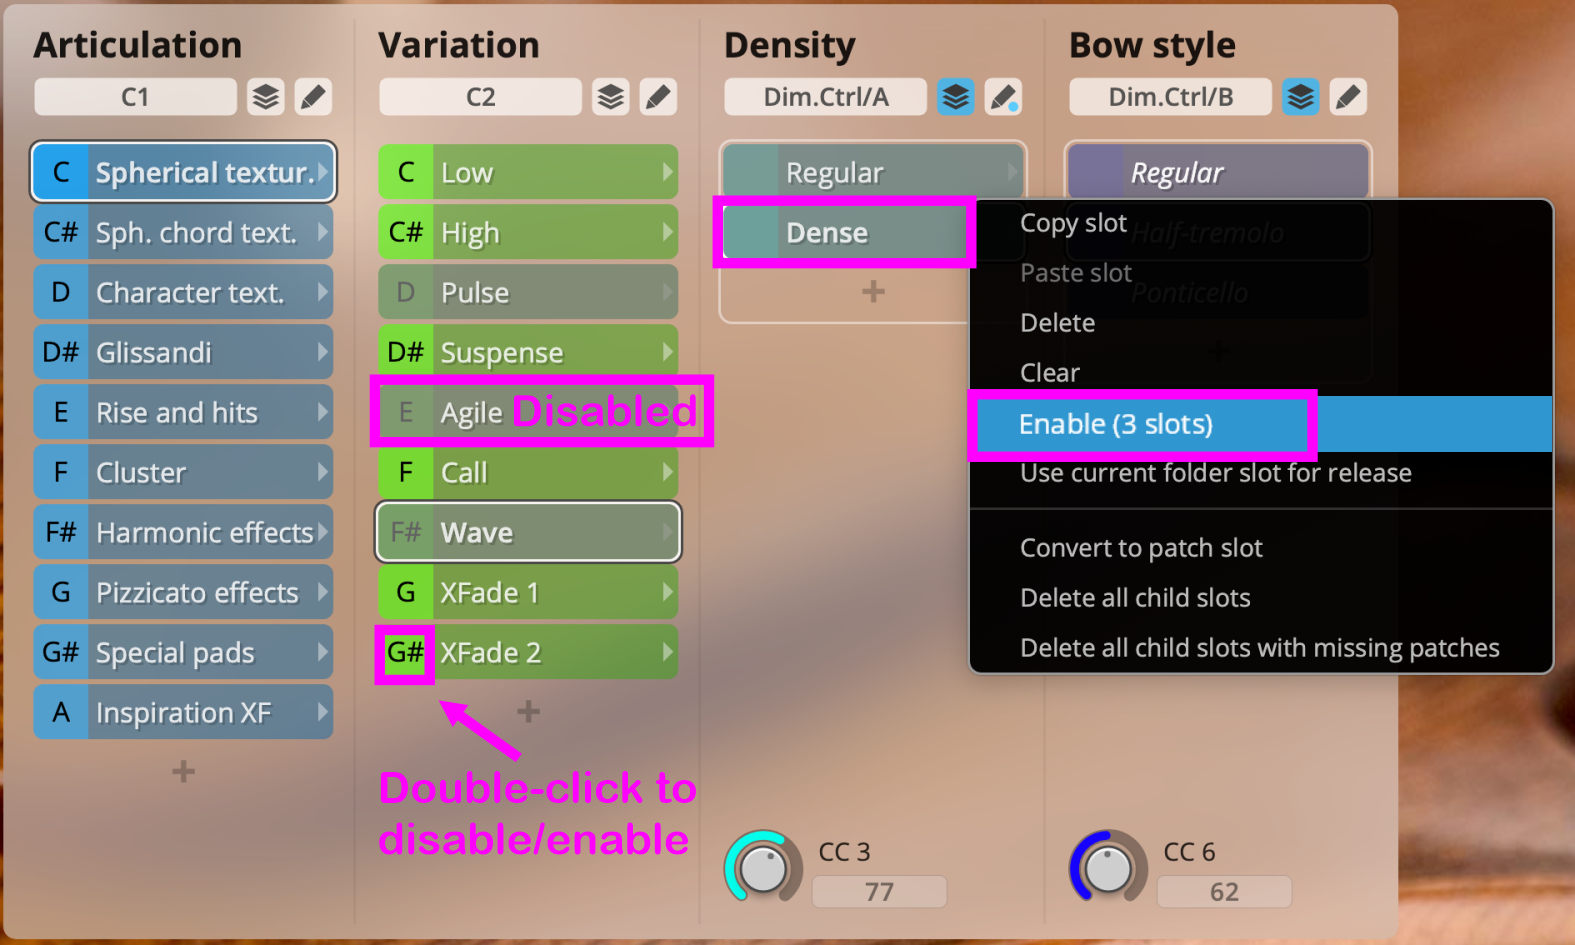
The dimension tree view is the centerpiece of Synchron Player. Vertical rows of Slots are called Dimensions. Dimensions can be labelled for better orientation, and factory presets are organized in a consistent way. The highlighted slots (white frame) show the selected slots in each dimension, and you are always reading the structure from left to right until you get to the Patch Slot that contains the played articulation. Depending on the Synchron Player engine settings, presets may load with disabled slots (greyed out), so that no samples are loaded, initially. Double-click the field to the left of the slot name to load the samples contained in a slot.
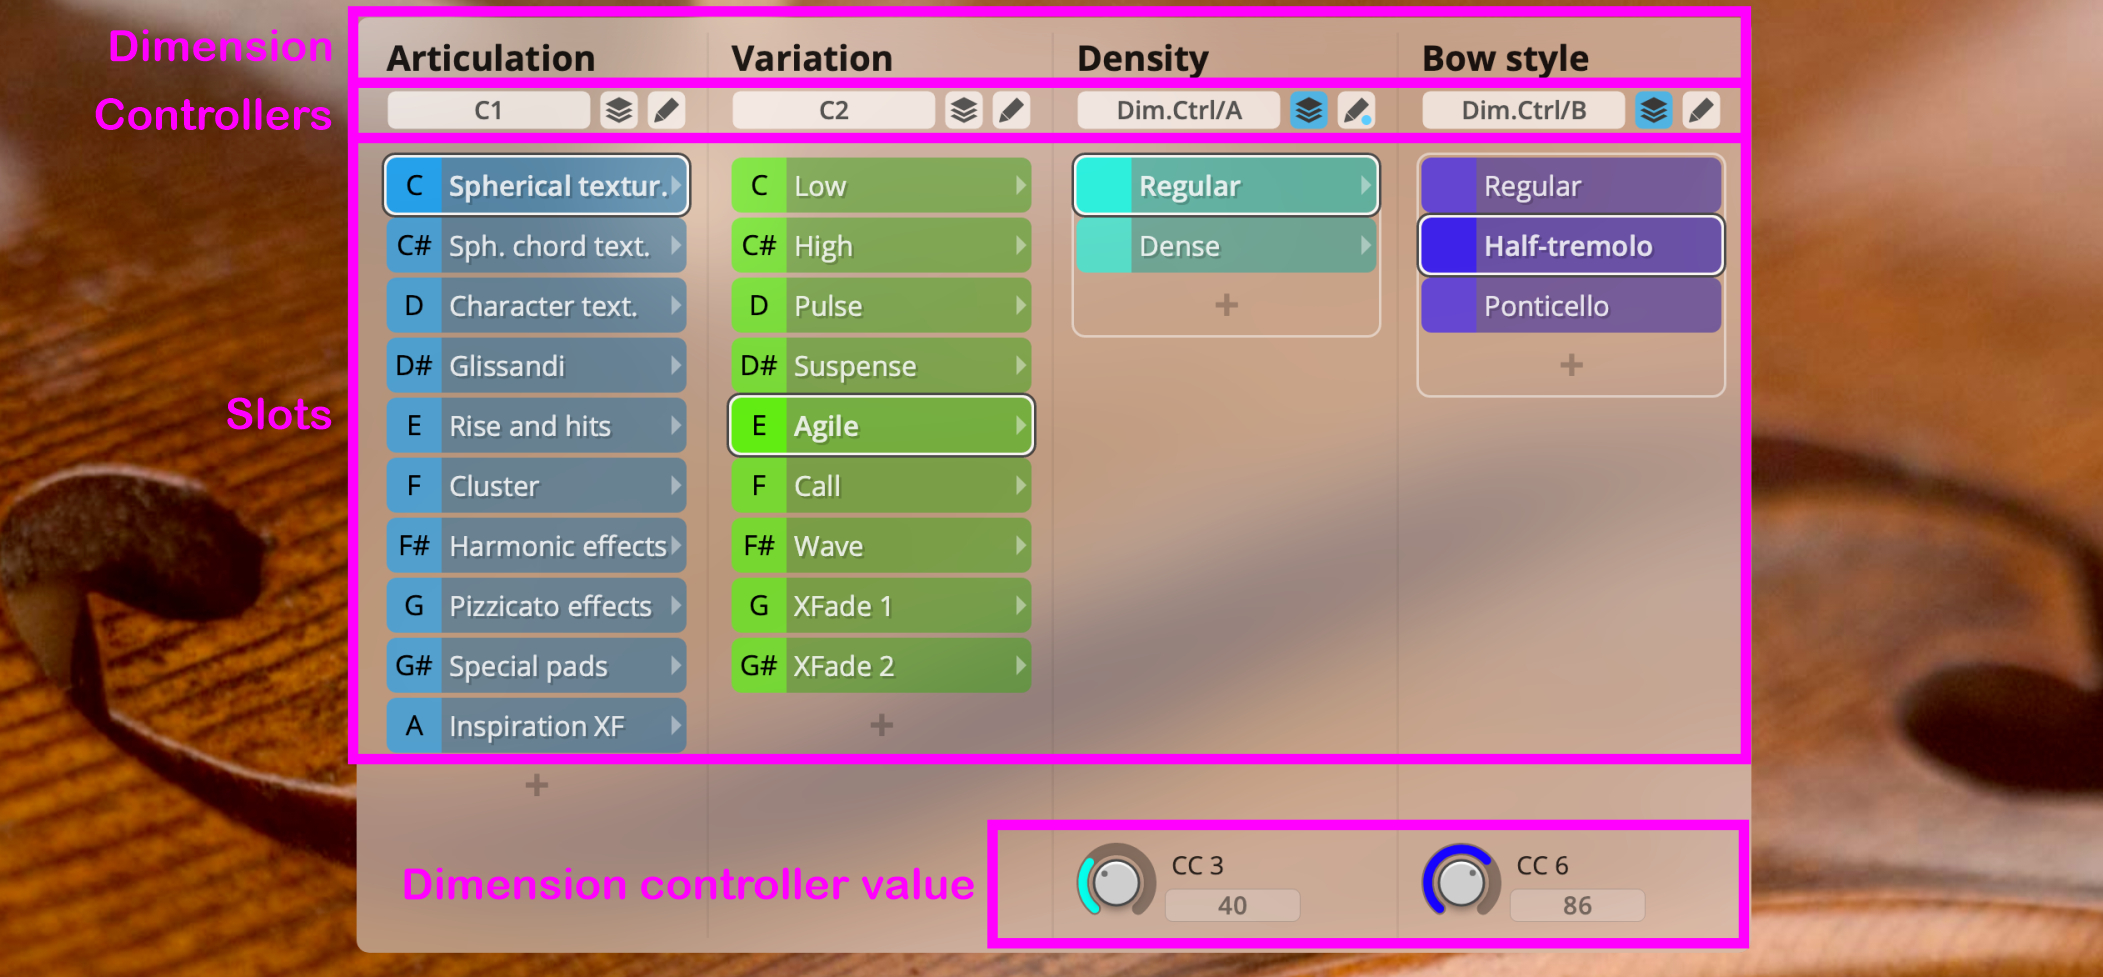
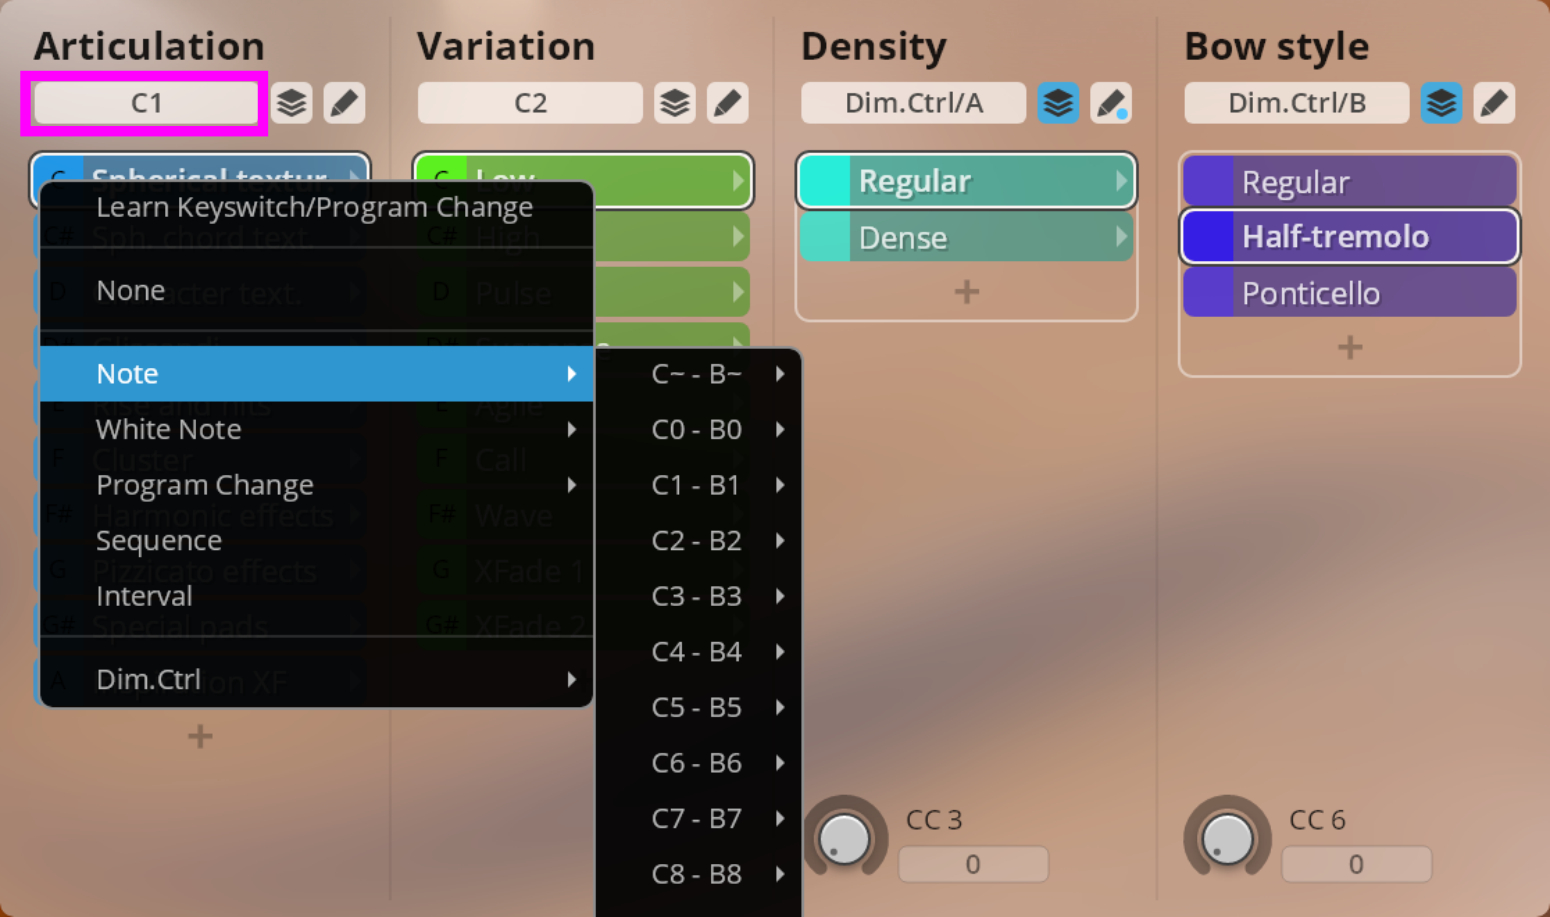
The nodes of a dimension can be activated in three different ways:
With None selected, no switching based on MIDI input takes place at all.
Discrete node selection can be effected with chromatic or white-key notes (the “keyswitches” which can be accessed directly via the keyboard), MIDI Program Changes, Sequence, and Interval.
Continuous node selection and crossfading employ special “Dimension Controllers” which are explained below.
Sequence
If Sequence is selected as the switch control, the Synchron Player will step through the nodes of the dimension sequentially The exact behaviour is defined by the following two parameters displayed next to the controller description.
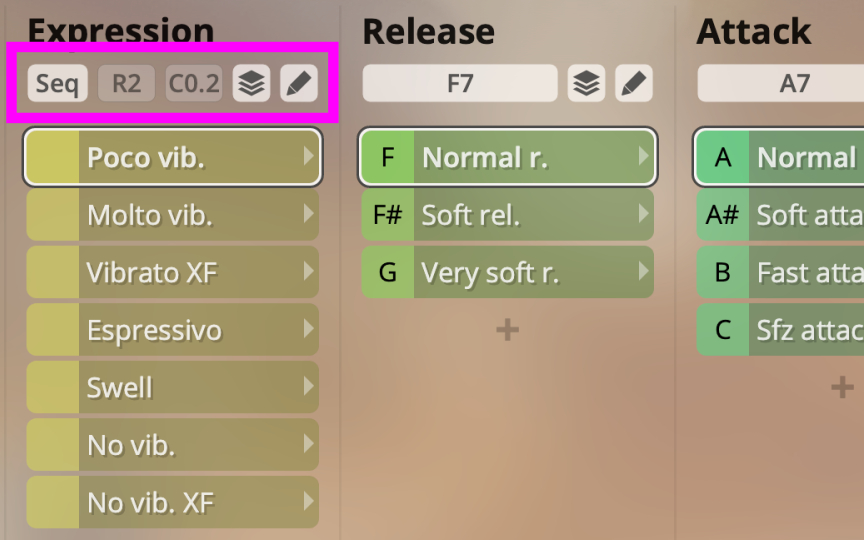
The left-hand value defines the sequence reset threshold in seconds. If no new note is triggered within this time, the sequence will reset. The right-hand value is the chord threshold in seconds, which specifies that additional notes triggered within that time will not advance the sequence.
Interval
Setting control to Interval means that slots are selected according to the legato interval (i.e., overlapping note-ons) played, with the middle slot defined as center. The Synchron Player then switches slots according to the intervals played, with a new starting note always beginning at the center.
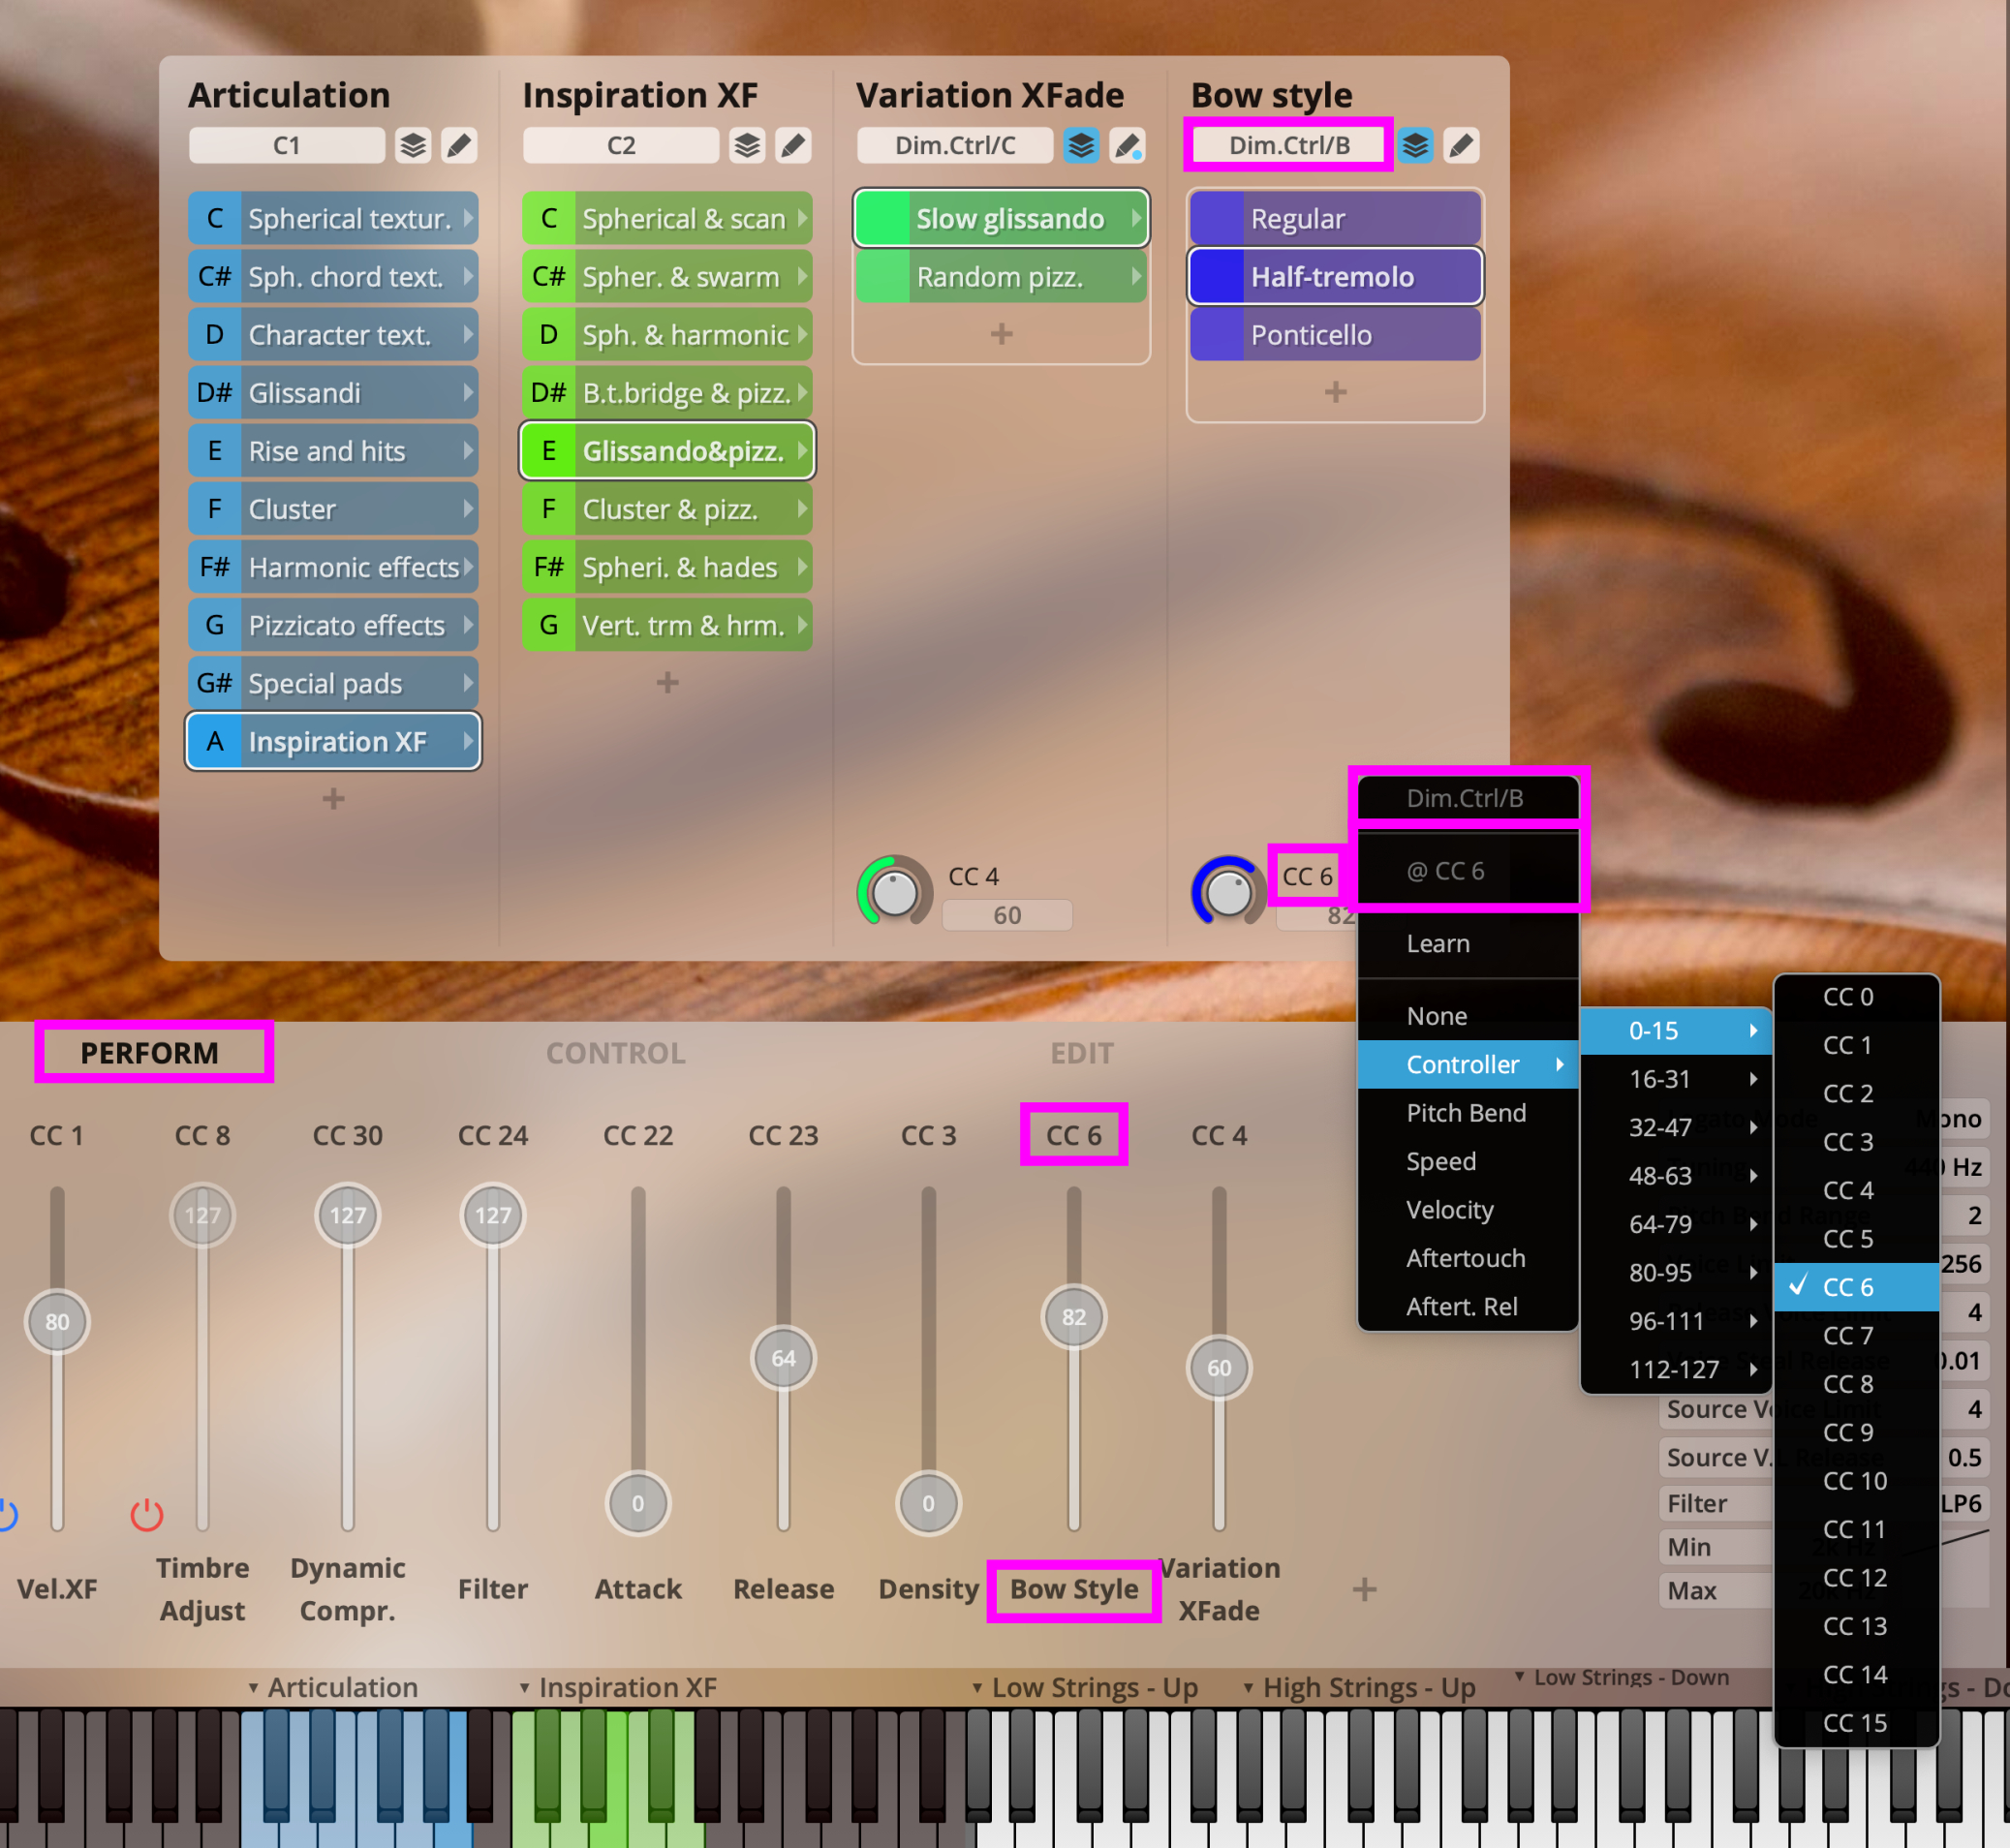
If 1 of the 8 available Dimension Controllers (labelled A-H) is selected for a Dimension, you can see the control knob and the assigned MIDI Controller at the bottom of the Dimension.
Click in the field to see the available sources you can assign for the selected Dimension Control:
Controller (MIDI CC)
Pitch Bend
Speed
Velocity
Aftertouch
Aftertouch Release
All assigned controls are also listed in the PERFORM Tab below the tree view, where you can additionally manipulate each controller curve.
The stack symbol next to the Controller switches Parallel Mode on (blue) and off (grey).
With active Parallel Mode, all nodes of a Dimension are streamed and available, allowing for smooth transitions between them at the cost of increased CPU usage. This comes in handy especially in combination with the continuous Dimension Controllers. Active Parallel Mode also enables the selection of the two “blend modes” XFade and Mix. These features are best explained by way of the Slot Crossfade Editor treated in the next section.

Slot Crossfade Editor
The pencil icon (marked with a blue dot when changes have already been made) opens the dimension’s Slot Crossfade Editor. Every slot in the dimension is represented by a row in the editor window. The currently audible slot is always highlighted in the dimension’s color. The display varies depending on the selected switch controller and Parallel Mode status.
For “None” or discrete switch controls (like Note, White Note, Program Change, Sequence and Interval), you will see rectangular graphs:
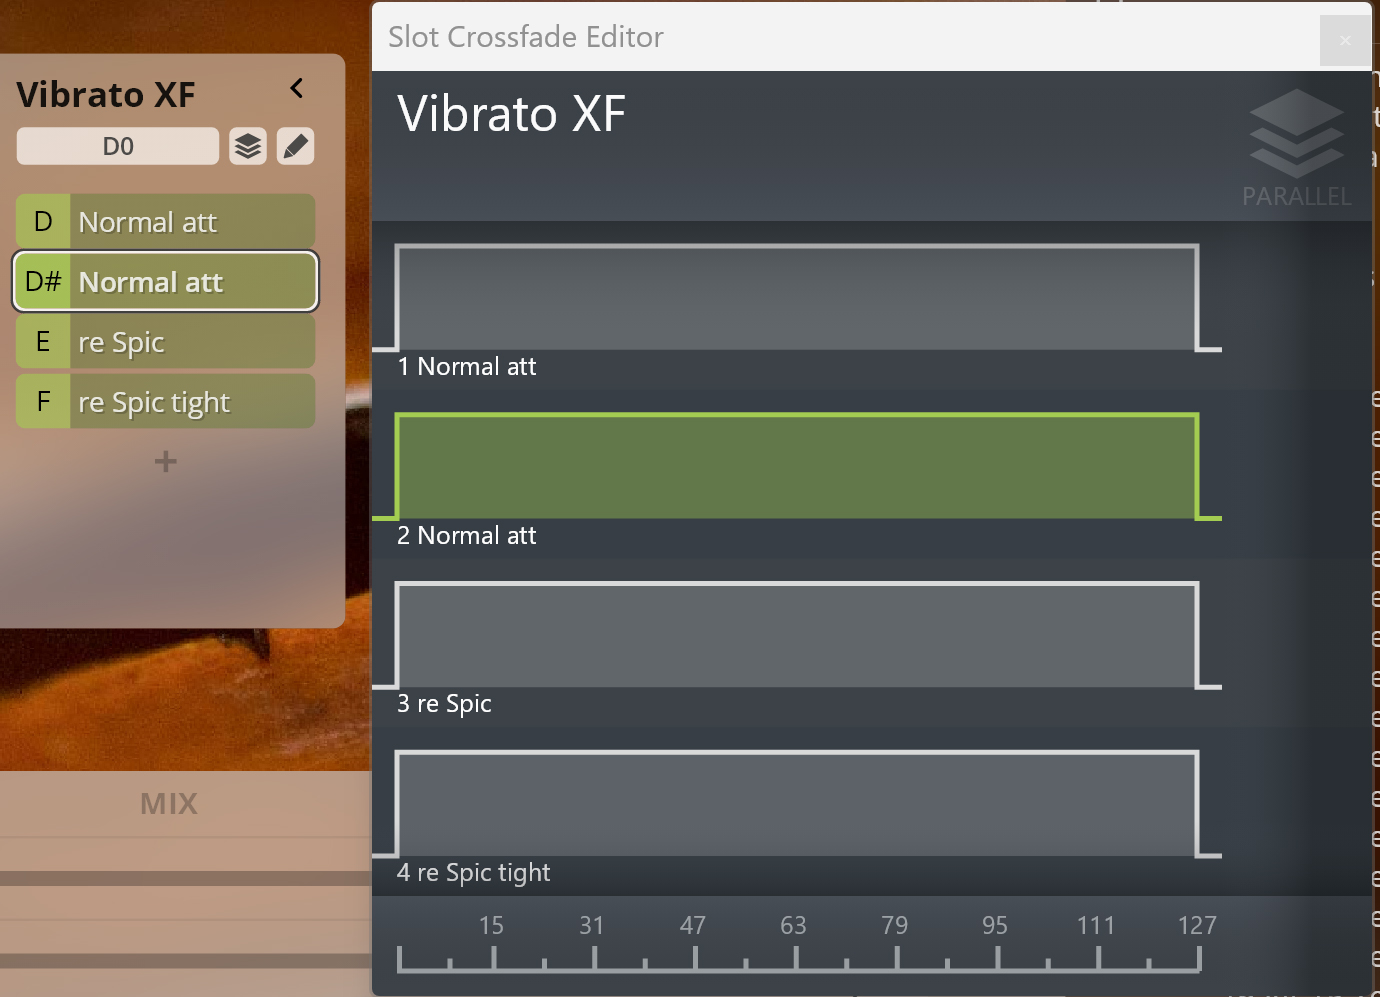
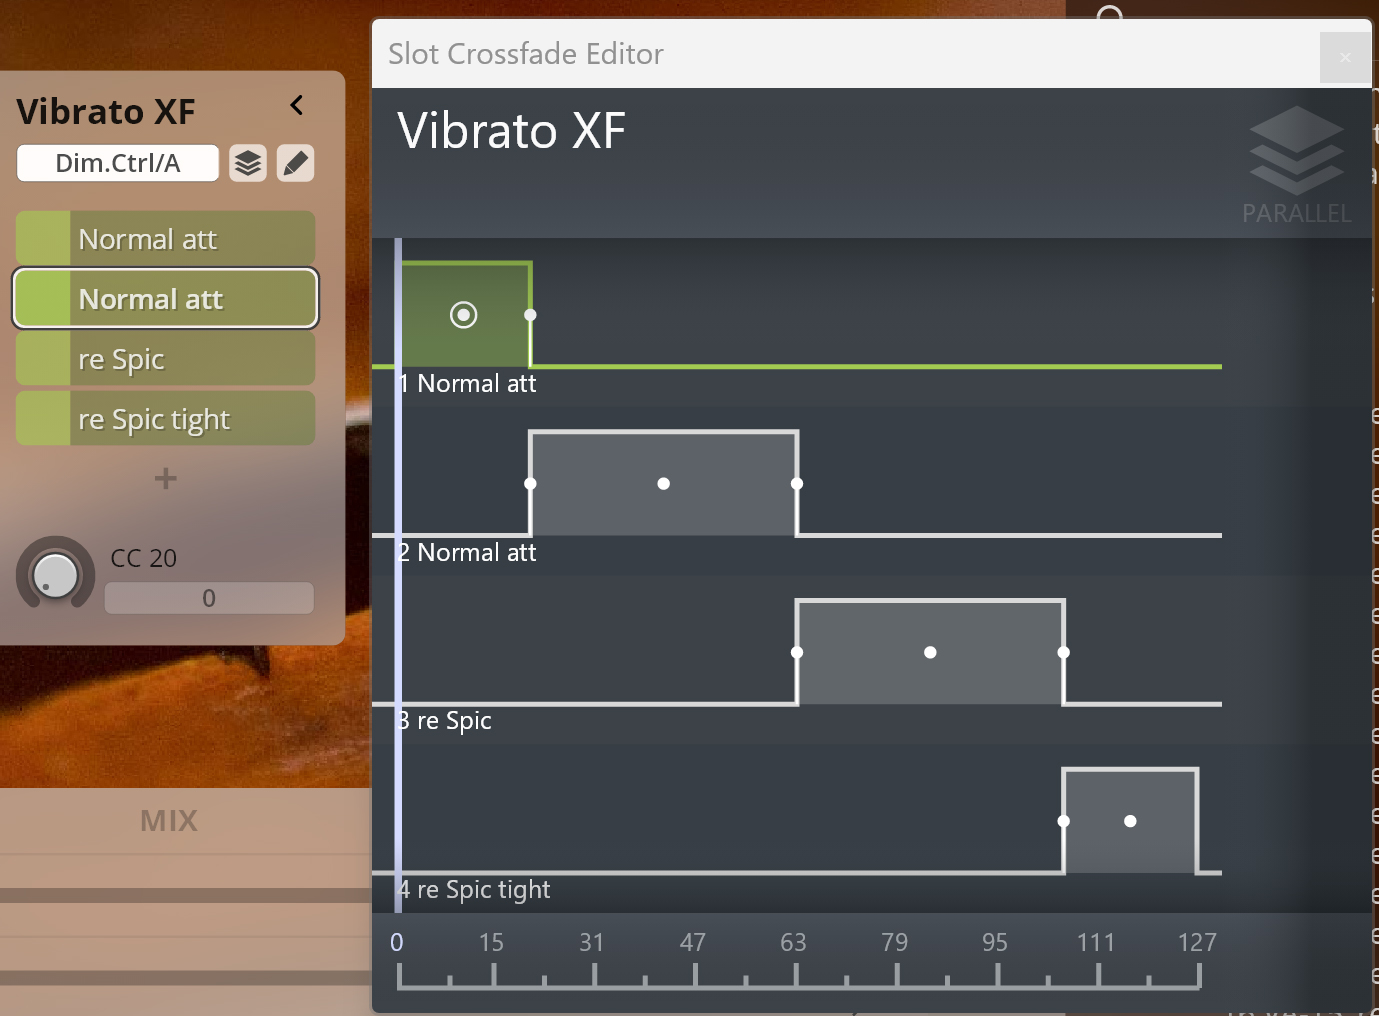
For continuous Dimension Controllers, the graphs indicate the controller value boundaries where a slot becomes active. The current controller value is shown by a blue vertical bar.
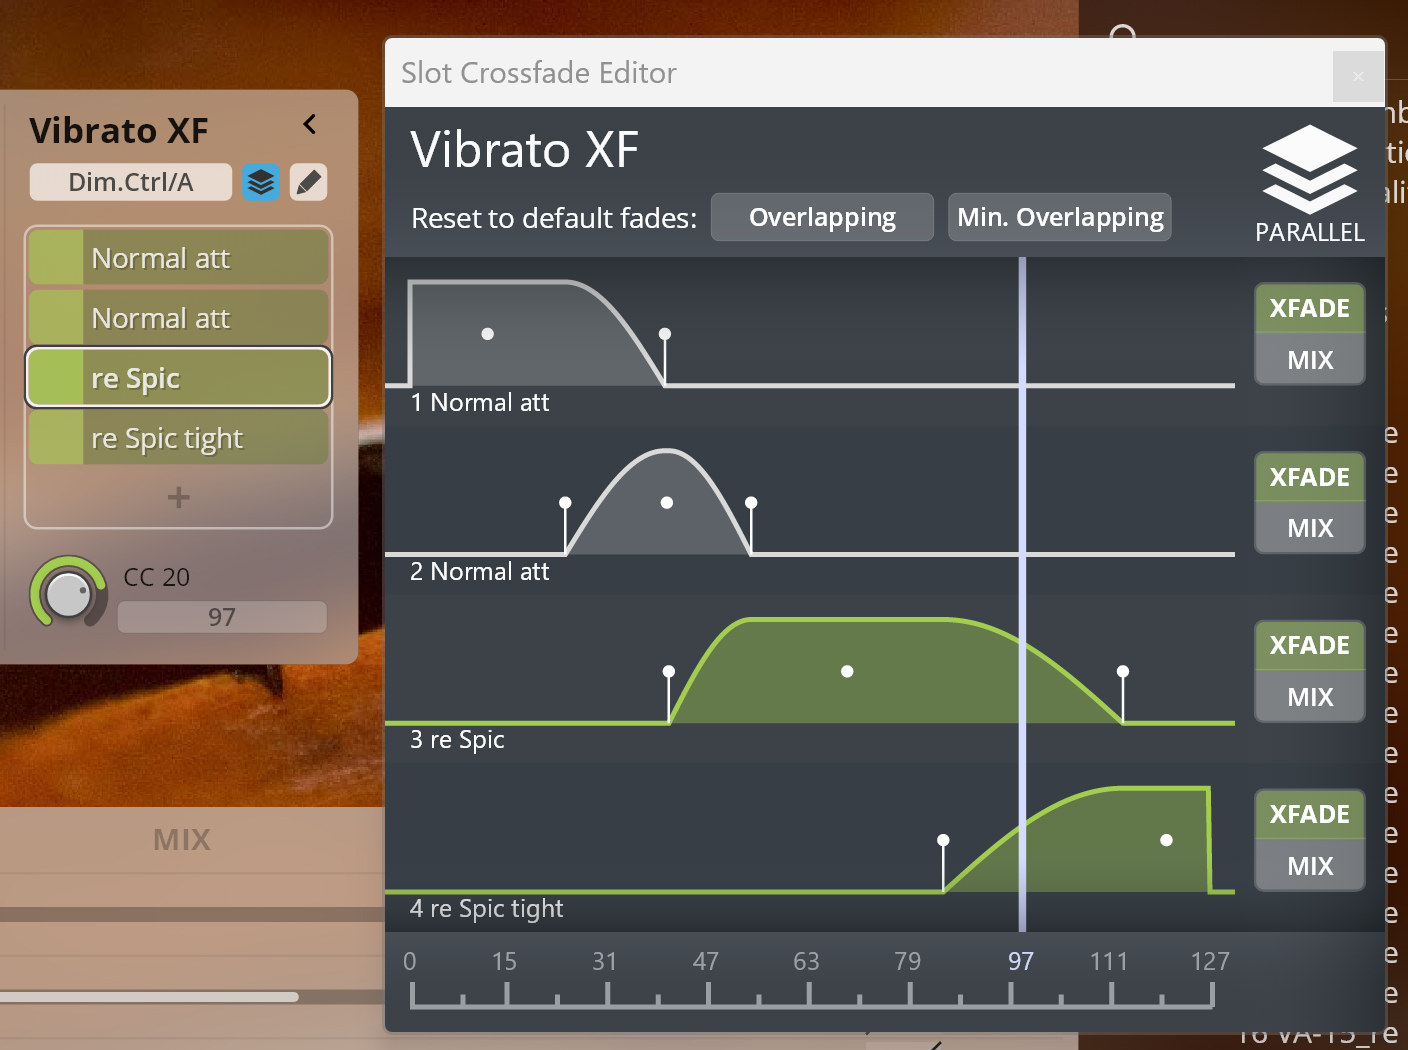
When Parallel Mode is active, slots can be crossfaded, and the display changes to crossfade curves. Use the white handles (and optionally mouse modifiers) to adjust crossfading behaviour. Click the Overlapping or Minimum Overlapping buttons at the top of the window to create default fades. As above, colored rows indicate which slots are currently active.
If the “blend mode” mentioned above is set to MIX, the respective slot will always play, which is again indicated by the row being colored accordingly.
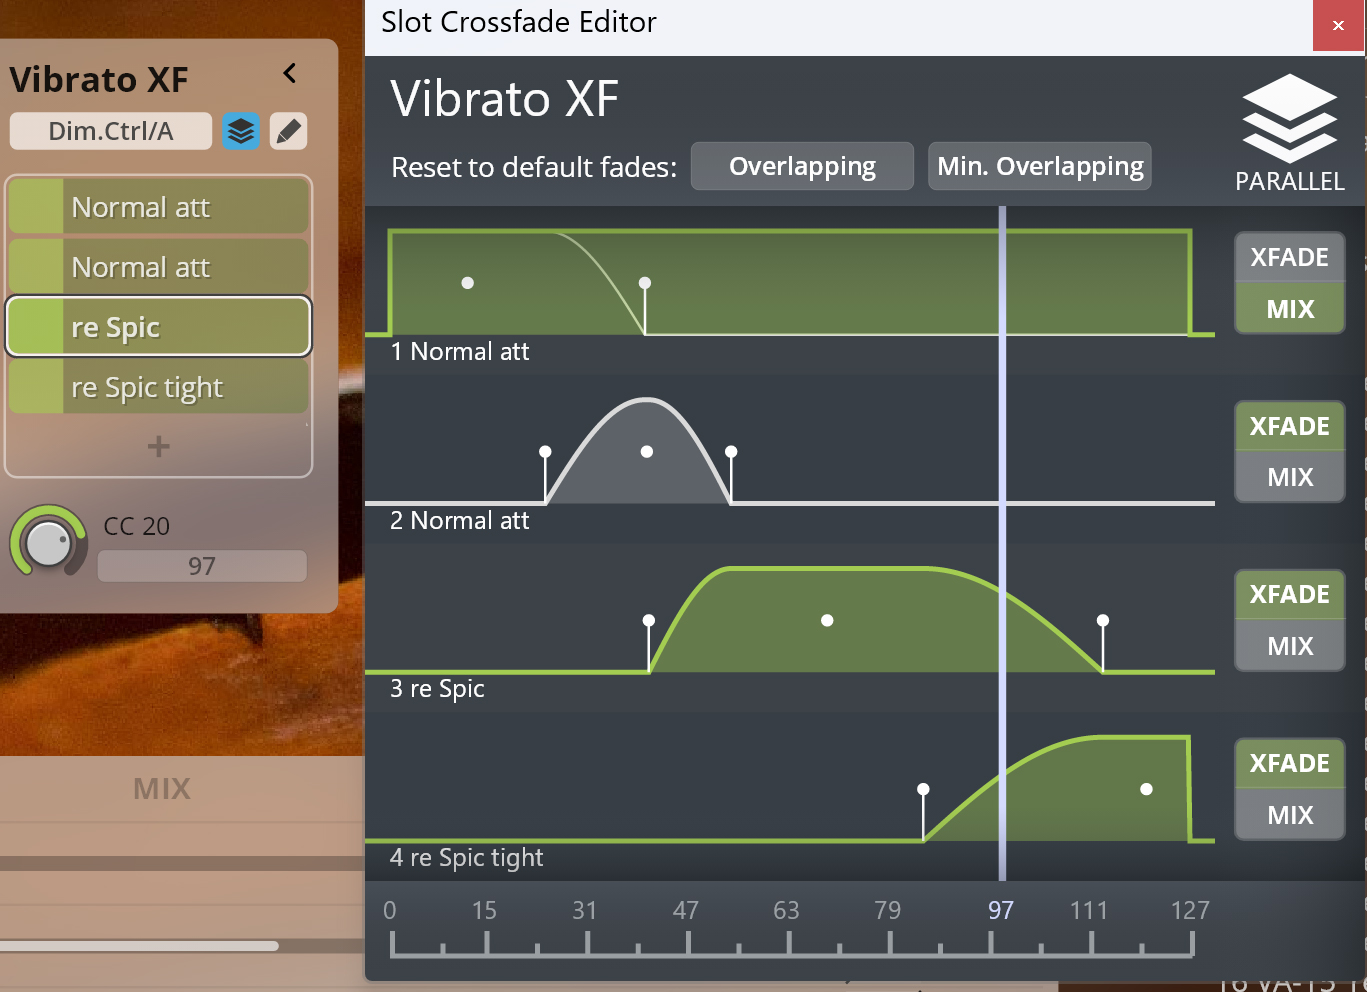
The combined settings of switch control, parallel mode and blend mode make the Dimension Tree extremely versatile. You can always take a look at the Slot Crossfade Editor, whose color coding and node graphs will show you exactly which slots are active. Hovering over the various elements of the Slot Crossfade Editor will also show useful information in the bottom right corner of the Synchron Player GUI.
Tip
With Synchron FX Strings I, you will minimize the streaming load a lot if you switch off Parallel Mode whenever it is not needed.
Folder Slots contain further slots and are marked with a small arrow (see below). Patch Slots contain the articulation you hear. As they are related, folder slot/parent slot will be called parent slot/child slot.
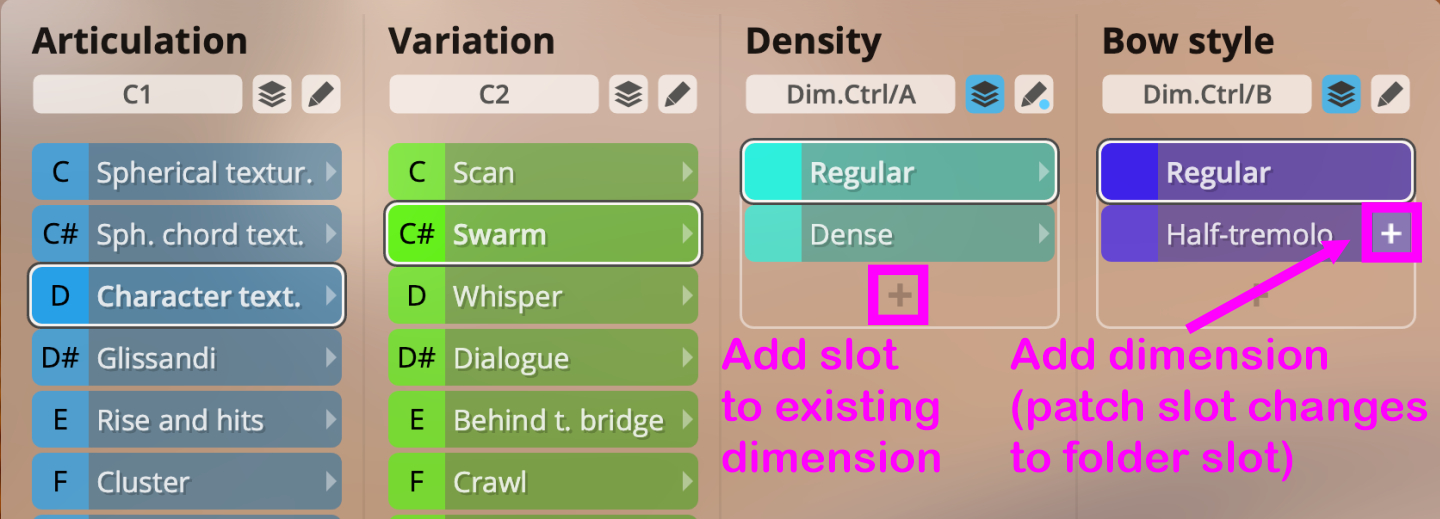
To add another slot to a dimension, click the + sign below the last slot. To create a new dimension, click the + sign that appears when you hover over a patch slot. This will also convert a patch slot to a folder slot.
Factory Presets are saved with disabled slots (greyed out), so that no samples are loaded, initially. You can load the samples contained in a slot (and all child slots) by double-clicking the colored field to the left of the name or via the slot context menu (right-click on a slot to see it).
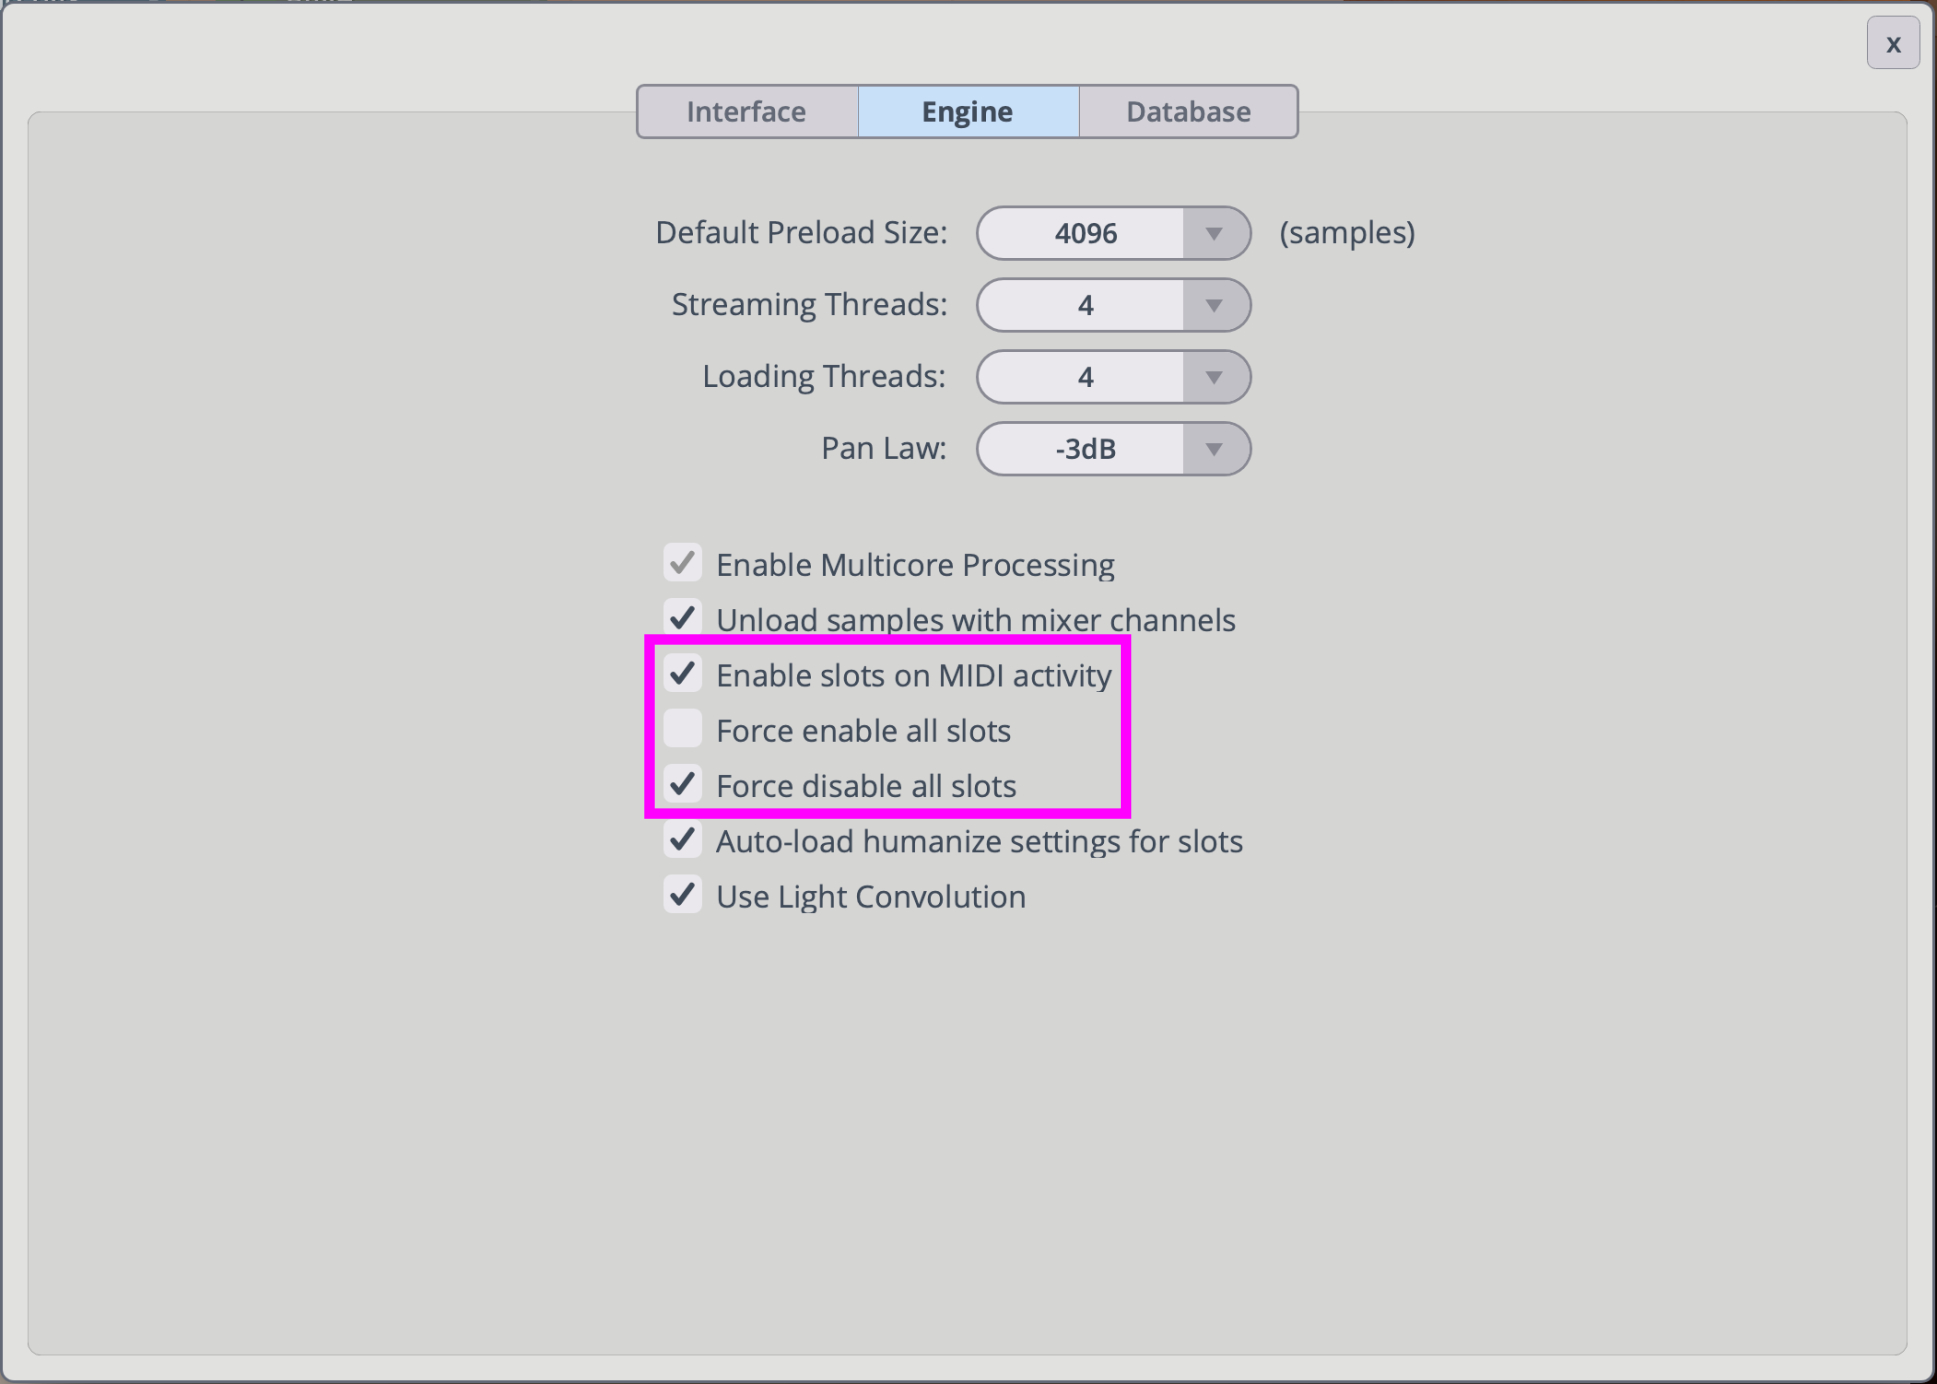
Additionally, you can decide whether you want to force-enabled cells for all presets and patches you are loading, in the Synchron Player Settings.
Copy slot: Copy slot and all contained child slots to the clipboard.
Paste slot: Paste slot and all contained child slots from the clipboard.
Delete: Delete selected slot and all contained child slots.
Enable (number of affected slots): Load samples of selected slot and child slots.
Use current folder for release: Use the Release samples of the current folder as a release sample.
(Folder Slot only) Convert to patch slot: Transform the selected folder slot to a patch slot.
(Folder Slot only) Delete all child slots: Delete child slots of the selected folder slot.
Folder slot – Delete all child slots with missing patches: Delete child slots of the selected folder slot that do not contain any patches.
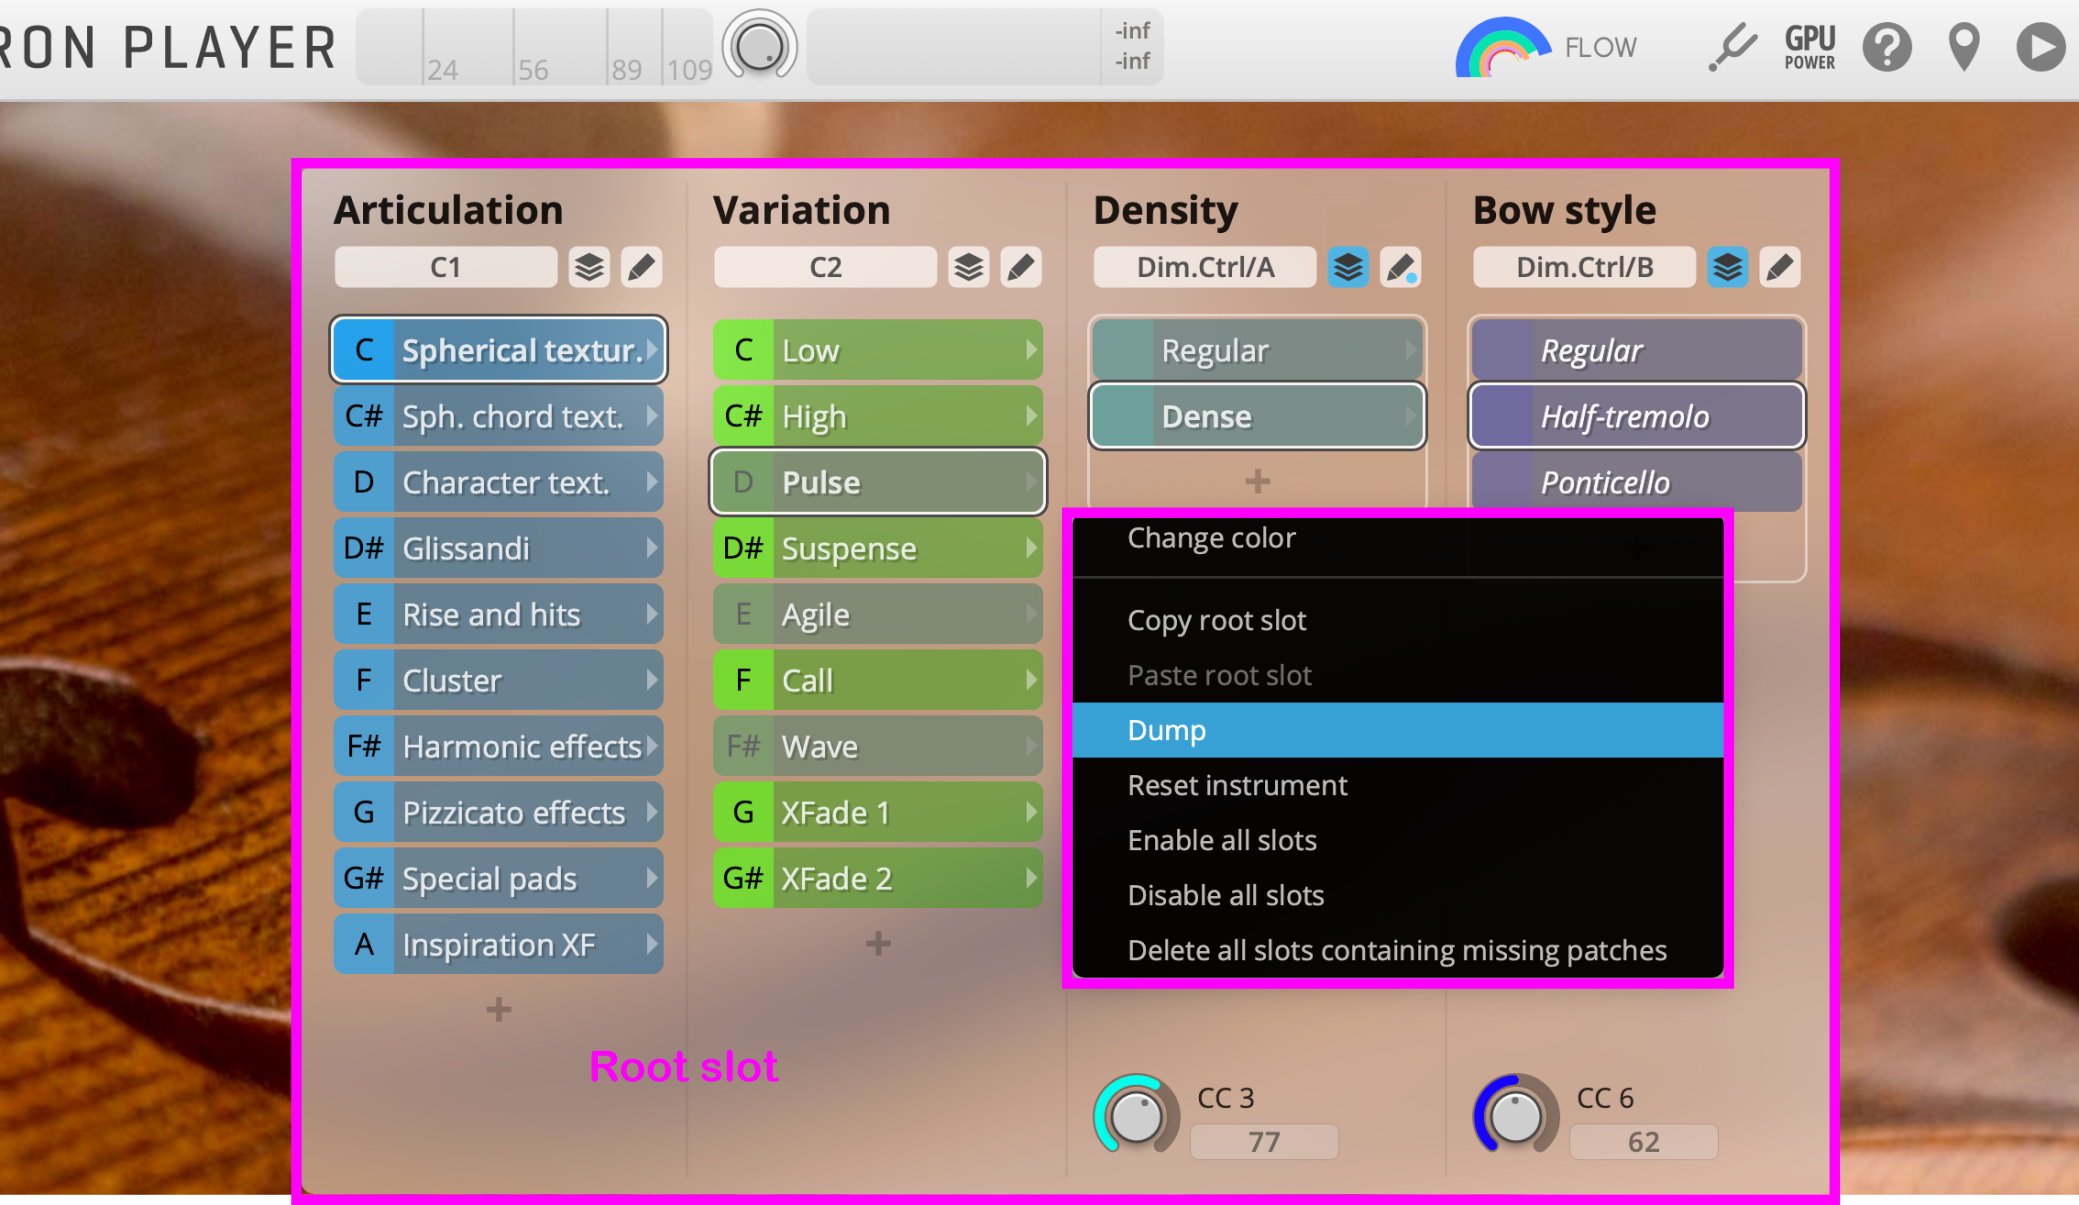
Change color: Select a color for the selected dimension.
Copy root slot: Copy the root slot, which contains the whole tree structure, into the clipboard.
Paste root slot: Paste the root slot, which contains the whole tree structure, from the clipboard.
Dump: Sends the current slot selection to your sequencer.
Reset instrument: Resets the whole instrument.
Enable all slots: Affects all slots.
Disable all slots: Affects all slots.
Delete all slots containing missing patches: Great for preset creation, this feature deletes all slots that contain a patch that cannot be loaded or are not available for a specific instrument.