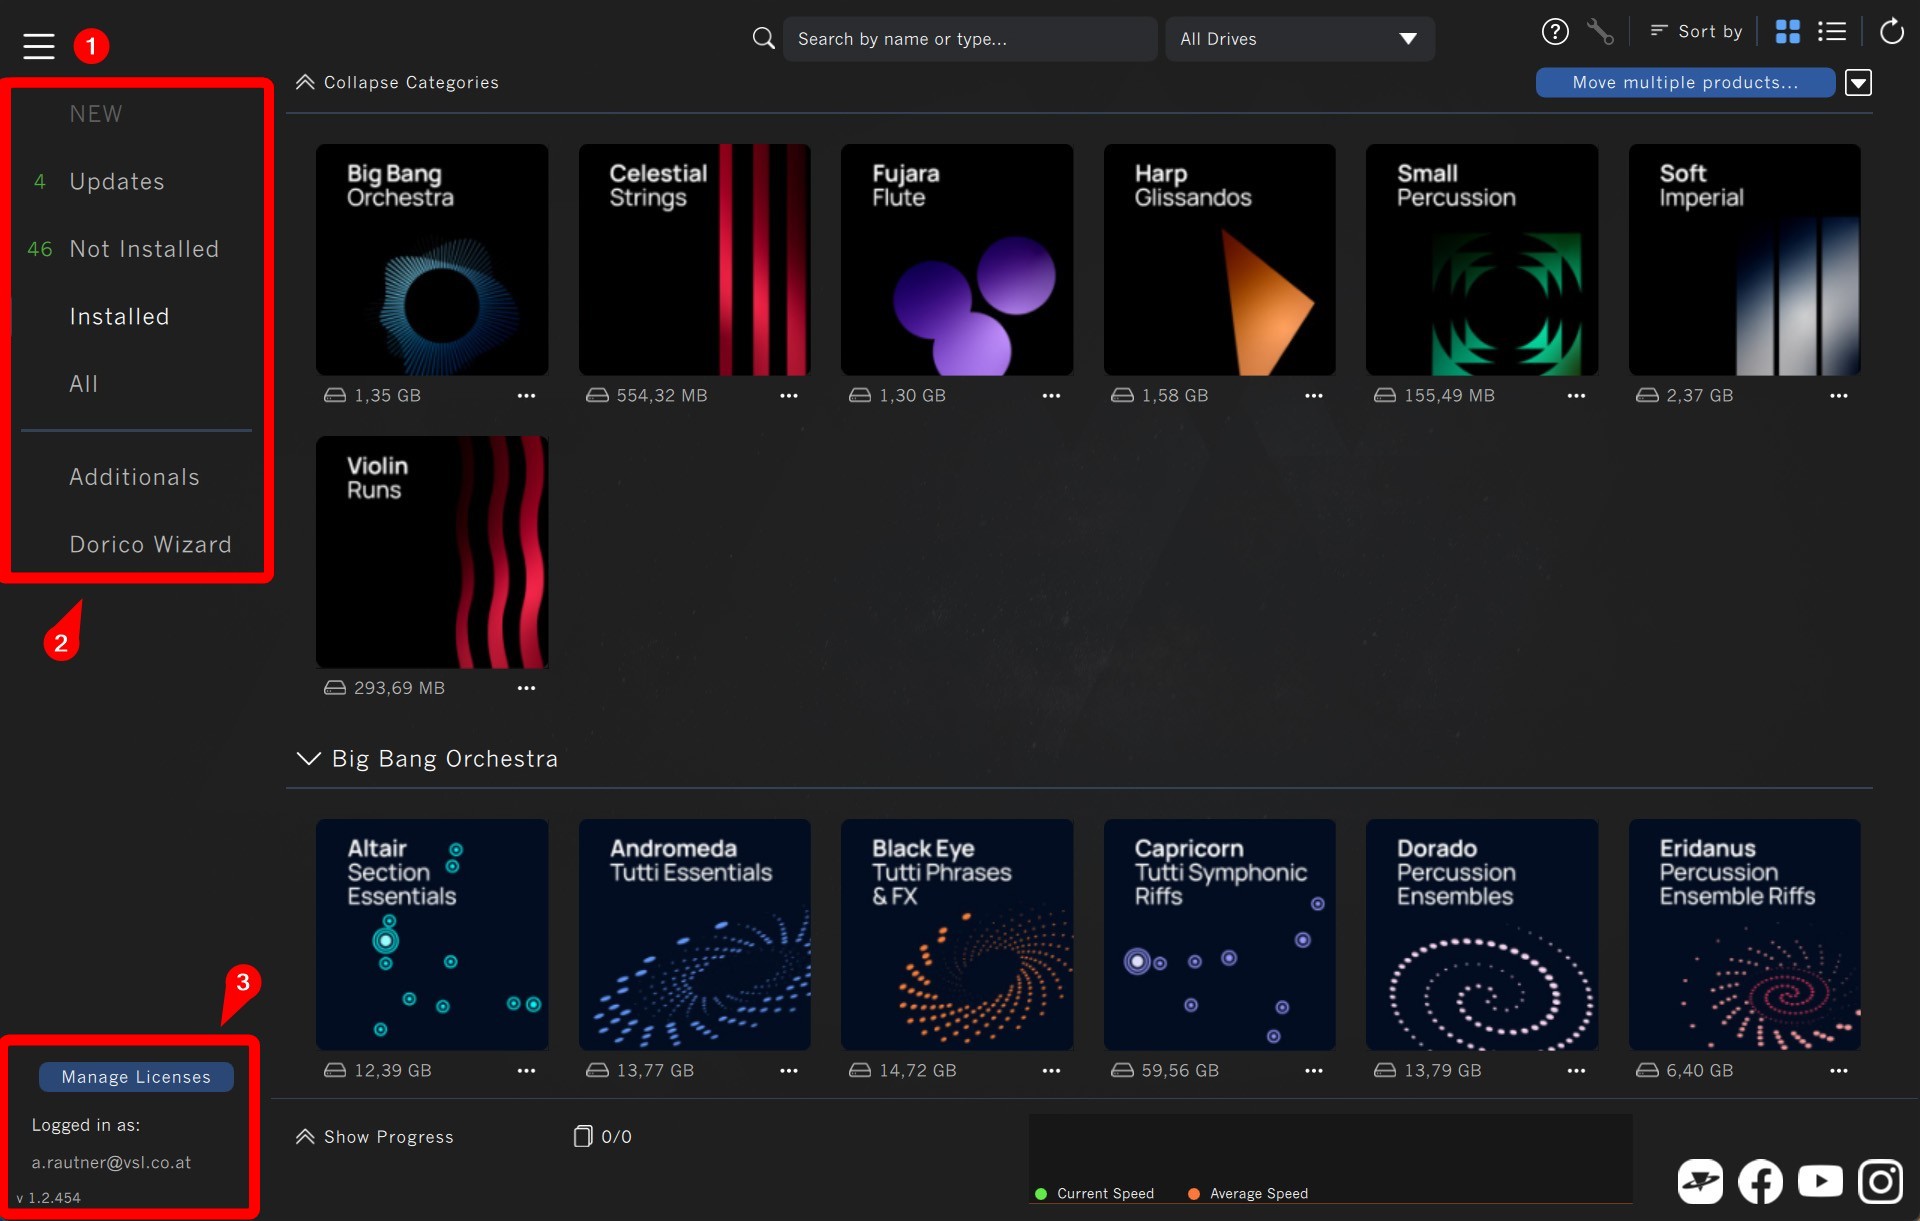
The main view of the Vienna Assistant gives you quick access to all essential features.
In the top left corner, you can access the main menu (1). You can quickly access the preferences, create a support file, and access many other useful features. Use the sidebar filters (2) for quick access to your groups of products (New/Updates/Not installed/Installed/All).
The sidebar also allows access to useful Additionals, such as templates, demo songs, etc., and the Dorico Wizard if the Dorico Software from Steinberg is installed on the system.
The bottom (3) of the sidebar allows quick access to the iLok License Manager via the 'Manage Licenses' button and information about the current user login, which we will use as the Vienna Assistant software version.
Top Bar
When filtering products, you can use the search field (5) and drive filter (6) to further refine your search.
In the top right corner, you find buttons (7) for access to:
Manuals (software & libraries)
Repair Mode (e.g., missing sample content)
Sorting (grid & list view)
Refresh (GUI refresh)
The button (8) below these icons allows you to manage multiple products simultaneously (update, download, install, uninstall, copy). A more detailed explanation can be found a bit further down below.
Bottom Bar
Use the 'Show/Hide Progress' button (9) to open an overview of all ongoing tasks. The indicators (10) to the right show a quick summary of all active tasks without opening the progress view.
The download graph (11) visually represents the ongoing download times and speeds.
Note
If you have limited the download speed in your Vienna Assistant preferences, you will also see this limit in the graph.
Use the social media buttons (12) to stay in touch with us!
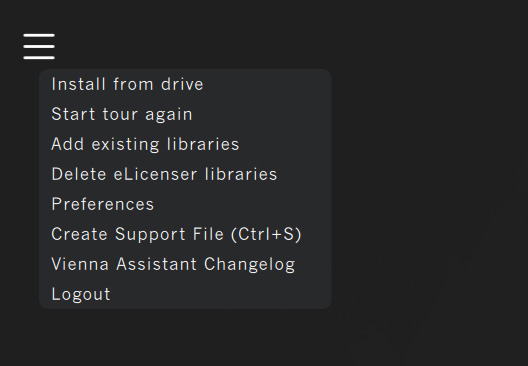
The Main Menu offers convenient options and access to the Preferences of your Vienna Assistant:
Install from drive offers a quick way to install our sample libraries and MIR Roompack data directly from a local drive, such as the Vienna Hard Drive. It also works for folders that contain installation files for multiple products.
Start tour again launches the guided tour you saw after your very first log-in.
Add existing libraries lets you add already installed content in one go (e.g., from another drive)
You can use Delete eLicenser libraries to free up space quickly. This will remove the redundant, old sample content and clean up your database.
Preferences show all user settings of the Vienna Assistant.
Create Support File is a great way to provide the Vienna support team with helpful information. The generated ZIP file will be placed directly on your desktop.
Vienna Assistant Changelog is a quick way to learn about the latest fixes & implemented features.
Logout [online only] brings you back to the login page.
This view is the fastest way to manage many tasks at once. Access it from the main view via the button in the top right corner — e.g., 'Install multiple products...'. To return, click on 'Return to main view...'. (1)
Select by clicking on the product tiles (2) or modifier keys (3) for quick multi-selection.
Available modifyer keys
Hold the SHIFT button and hover over the product tiles to quickly add more products. No clicking is necessary. Use the OPTION/ALT key to deselect in the same way. CMD/CTRL + Click selects/deselects whole categories.
Double-check the current folder locations for download and installation (4) and start your tasks (5) once you are happy with your selection.
Before you try to repair products, please ensure that all drives containing your sample content are connected to your computer and appear in the Explorer/Finder.
An orange 'Repair' label (1) indicates missing sample content.
You can repair individual products by choosing Locate/Remove from the popup (2) or switch to the convenient Repair View via the orange wrench icon (3).
If you've reconnected the missing sample drive or know the location of the missing product folders, you can use the convenient 'Locate All' (5) button.
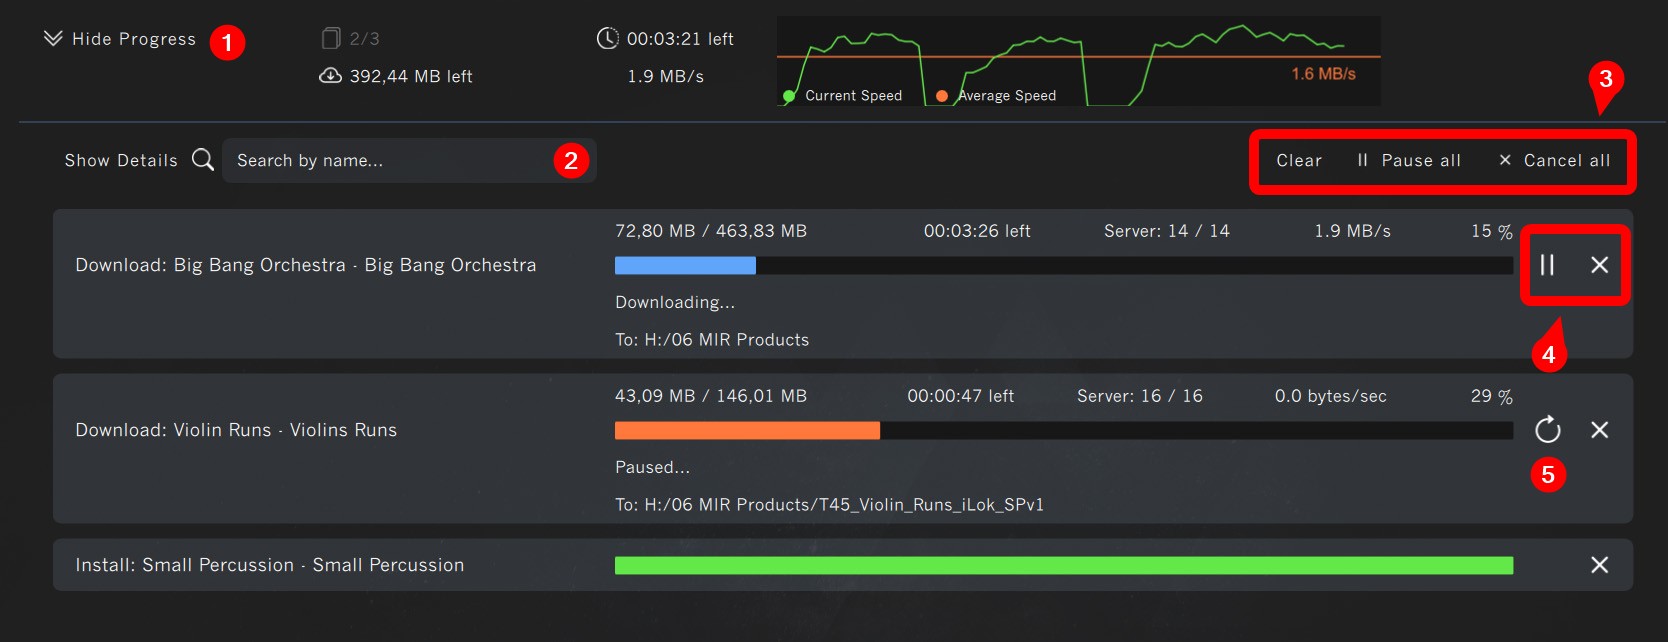
The Progress Overview lists all currently running tasks, and when you click Show Progress (at the bottom of the main view), additional information is available for all queued tasks.
Blue: Running tasks
Orange: Canceled & aborted tasks
Green: Finished tasks
You can return to the main view by clicking Hide Details (1). Alternatively, you can use the search bar (2) to find information about a specific task.
You can manage all tasks simultaneously (3) or individually (4). This includes Clear, Pause, Resume, Cancel, Remove.
In case a task is not finished as planned, use the Retry button (5).
Important
Move, Copy, and Delete cannot be stopped once they are active, and Canceling all will not affect these operations as they must be completed to avoid content issues.


