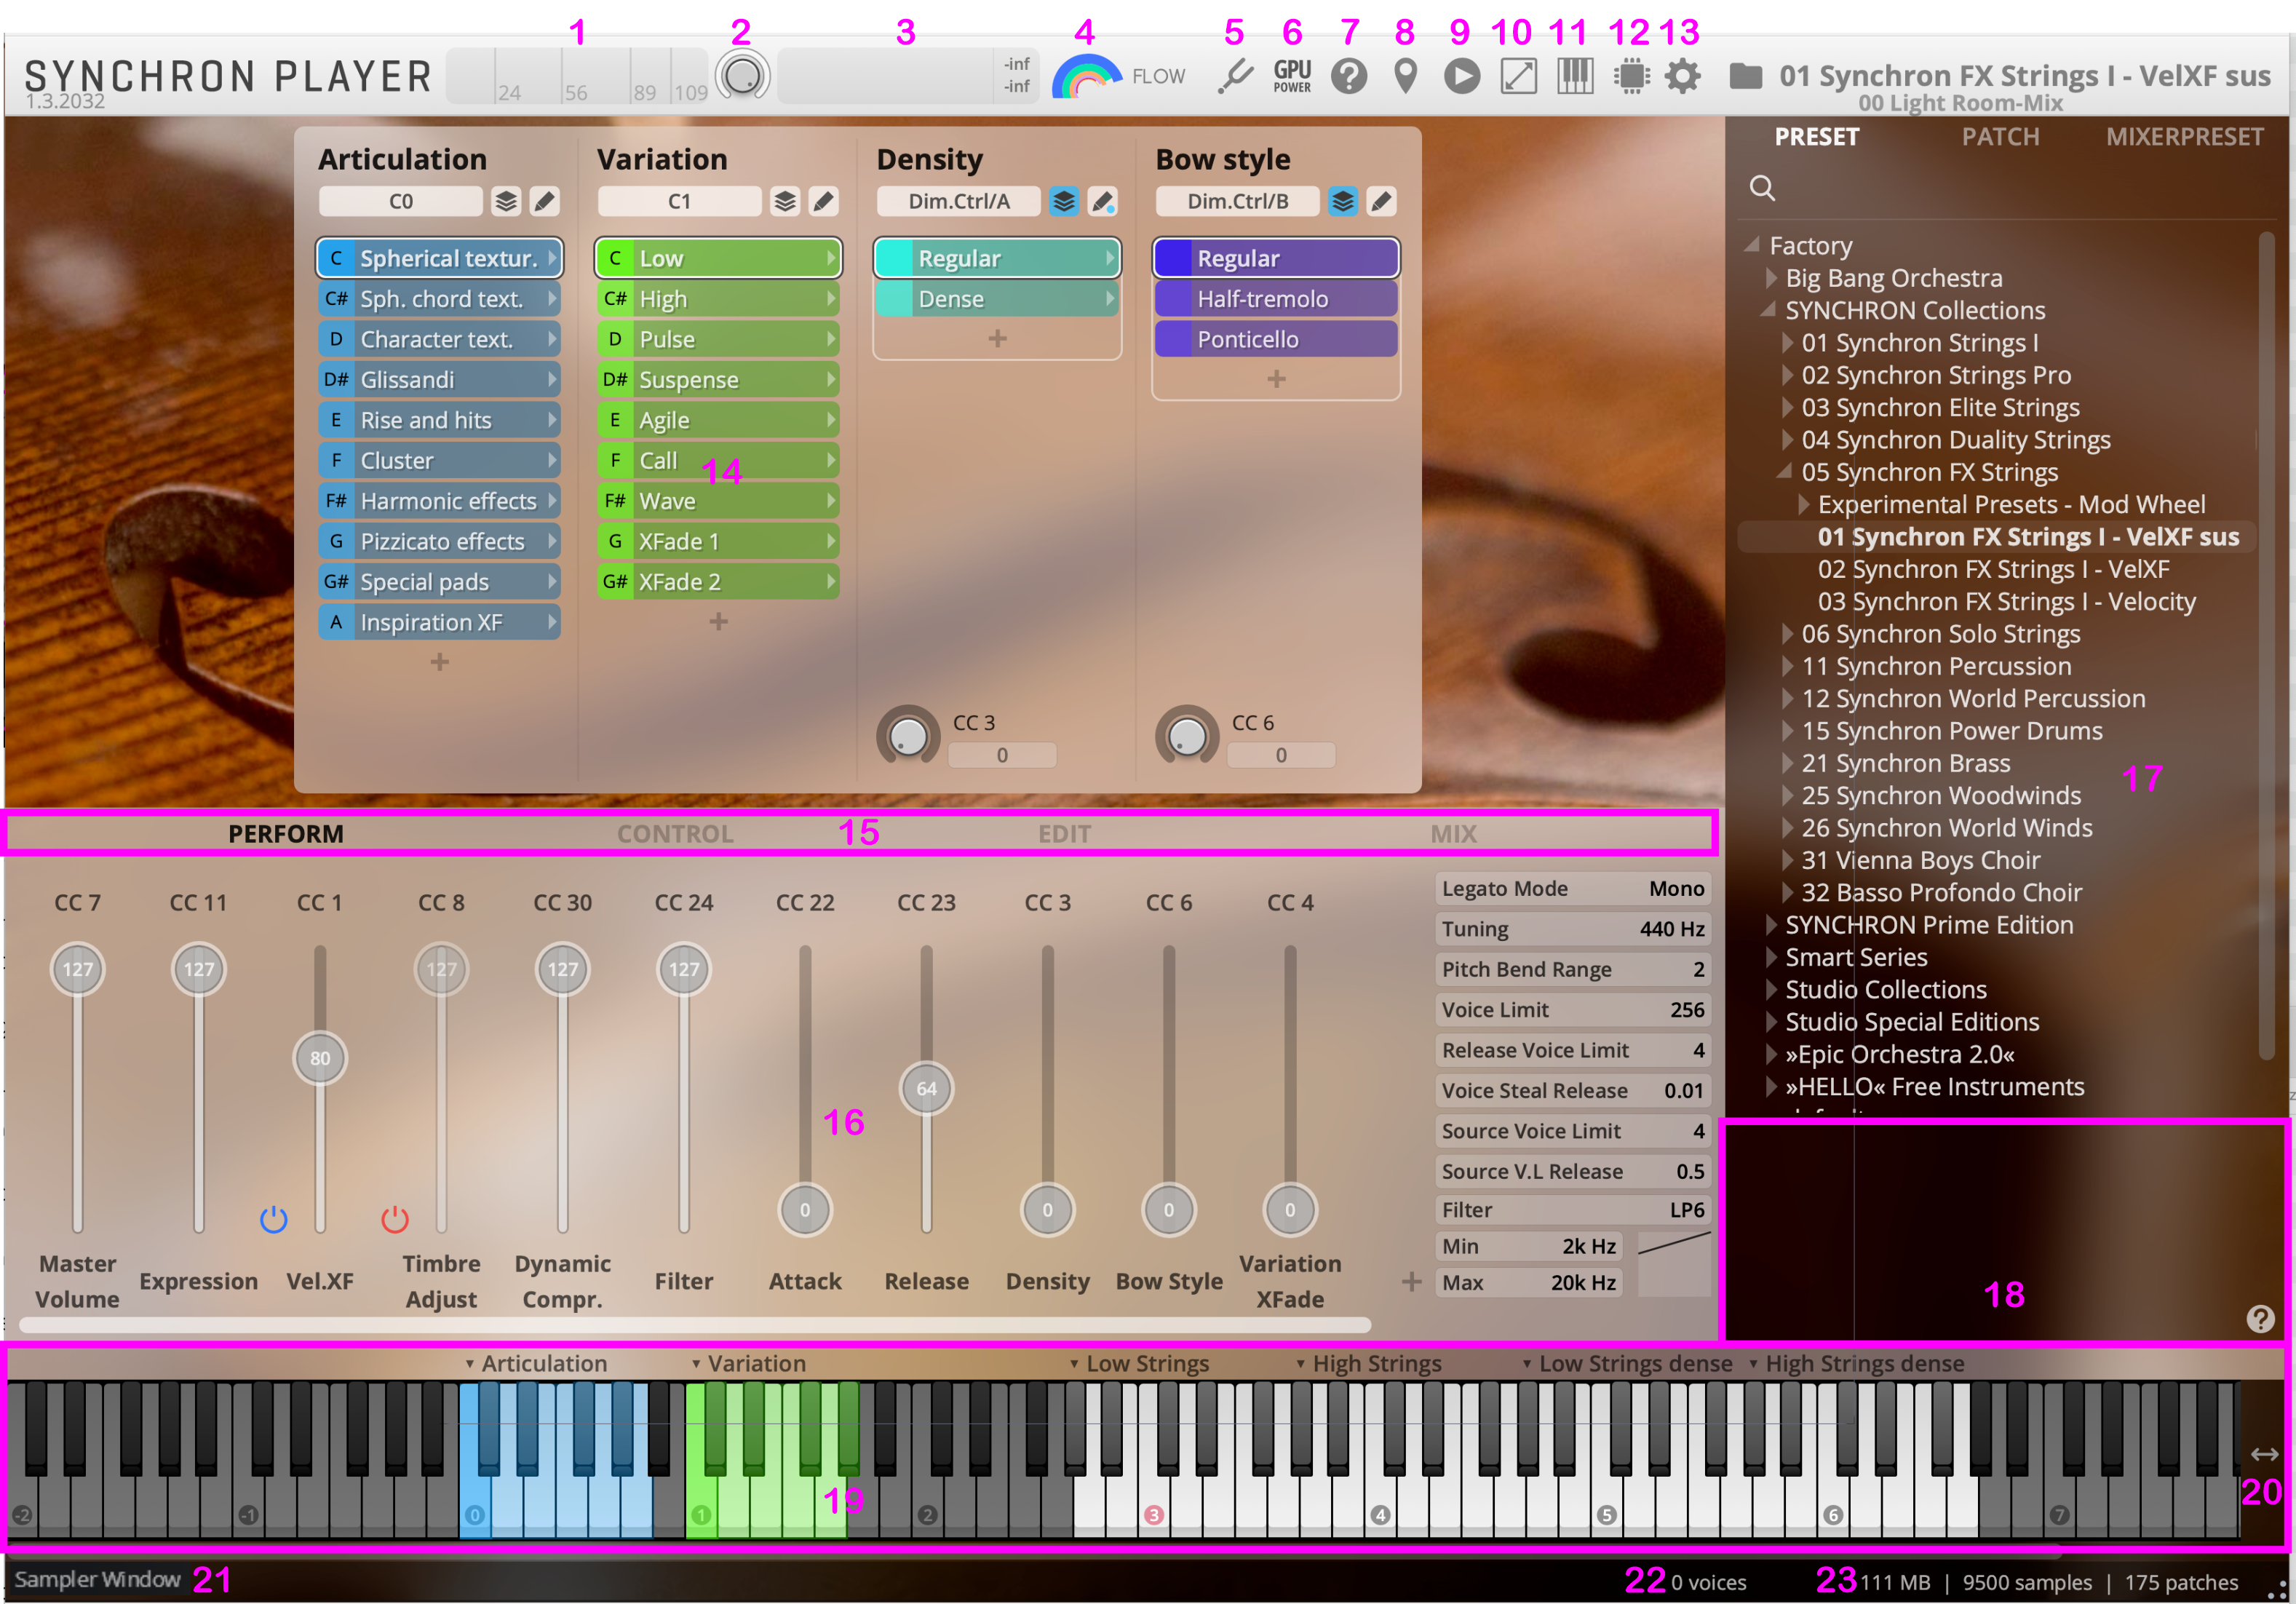
Velocity Histogram: Shows the received velocity of every key you play on your keyboard. You can freeze/unfreeze the Velocity Histogram by double-clicking on the histogram display.
Volume Knob: Adjusts the overall volume linked to the Master Volume audio parameter commonly assigned to MIDI CC7. Click-drag or double-click to edit. [Command]/[Ctrl]-click to reset.
Volume Meter: Displays the stereo output volume. Clipping will be indicated with a red display.
Flow View: Owners of collections prepared for this ease-of-use Preset structure can access it by clicking on the Flow icon. If you are in Flow View, the icon changes to that of Precision Presets.
Tuning: Choose tunings other than the common 12 tone equal temperament, from African to Western.
GPU Power: Activates GPU convolution for all Synchron Player instances.
Help: Opens this online manual in the system default browser.
MIDI Dump: Sends the current sampler slot selection to your sequencer, also via MIDI CC (set in Preferences).
MIDI Player: Available with Presets for Synchron Power Drums and Synchron World Percussion, this will open the MIDI Player in a separate window.
Scale Button: The Rescale Button lets you adjust the size of the Synchron Player GUI in steps from 75% to 200%.
Key Info: Opens an additional window showing the assigned keys on the keyboard.
CPU Real-Time Display: Displays the actual CPU load on your computer, showing peaks in red and average values in blue. Lower latencies and higher voice counts will result in a higher CPU load.
Settings: Lets you adjust your Interface and Engine settings, thus affecting general performance. Here you can also assign the correct sample content in the Database tab.
Dimension Tree View: Overview of all available articulations in the current preset.
Tab Selection: Choose from additional customizing options.
PERFORM: A selection of performance-relevant parameters and their assigned controllers. Any parameter from the Control tab can be added here.
CONTROL: List view of all parameters and their mapping to one of the many controllers. Any available engine parameter can be added and mapped here.
EDIT: Shows customization options for the selected slot in the tree structure.
MIX: Integrated mixer for all available microphones.Tab Display: Shows the controls selected in the tabs above.
Browser: Select from Presets and Patches for all available products.
Information Window: Find additional information and mouse-over information right here.
Virtual Keyboard: Shows the available play range for each selected slot. Keyswitches are coloured according to the corresponding dimension in the tree view. Find additional information in the line above the keys.
Activate Range Display: Shows the play range of the selected slot, with handles. Extension up to 1 octave.
Short Mouse-over information: Find a short version of the information window description.
Voices: Total number of played-back voices.
RAM load / samples / patches: Currently used RAM and sample count, as well as the number of patches.
Flow and Precision Presets
Most of our libraries provide two different kinds of Presets, accessible by clicking on the Flow icon resp. “Precision” in the Synchron Player’s top bar.
Precision Presets are what you already know if you own other VSL libraries. They allow you to explore the depths of the library, adjusting and tweaking parameters as you see fit.
Flow Presets offer an intuitive, graphic approach to the library’s contents, with instrument, articulation, and sound parameters displayed in a single window once you have selected the Preset you want to load from the Flow Browser.
Access our tailor-made drum grooves for Synchron Power Drums and Synchron World Percussion with this straightforward MIDI Player. The MIDI Player always plays back the tempo of the song position in your sequencer. Adjust the MIDI file to your liking (velocity/tempo) and import it into your sequencer via drag and drop.
In the Power Drums structure, you will find folders named “3 drum sets in 1 MIDI file”, and in World Percussion there are “Full ensemble for DAW” folders. These contain files with the included instruments distributed over different MIDI channels, so that you can use them all at once.
The MIDI files in the factory folder contain the elements of the groove, sorted by instrument, so that you can create your own grooves and experiment with different combinations.
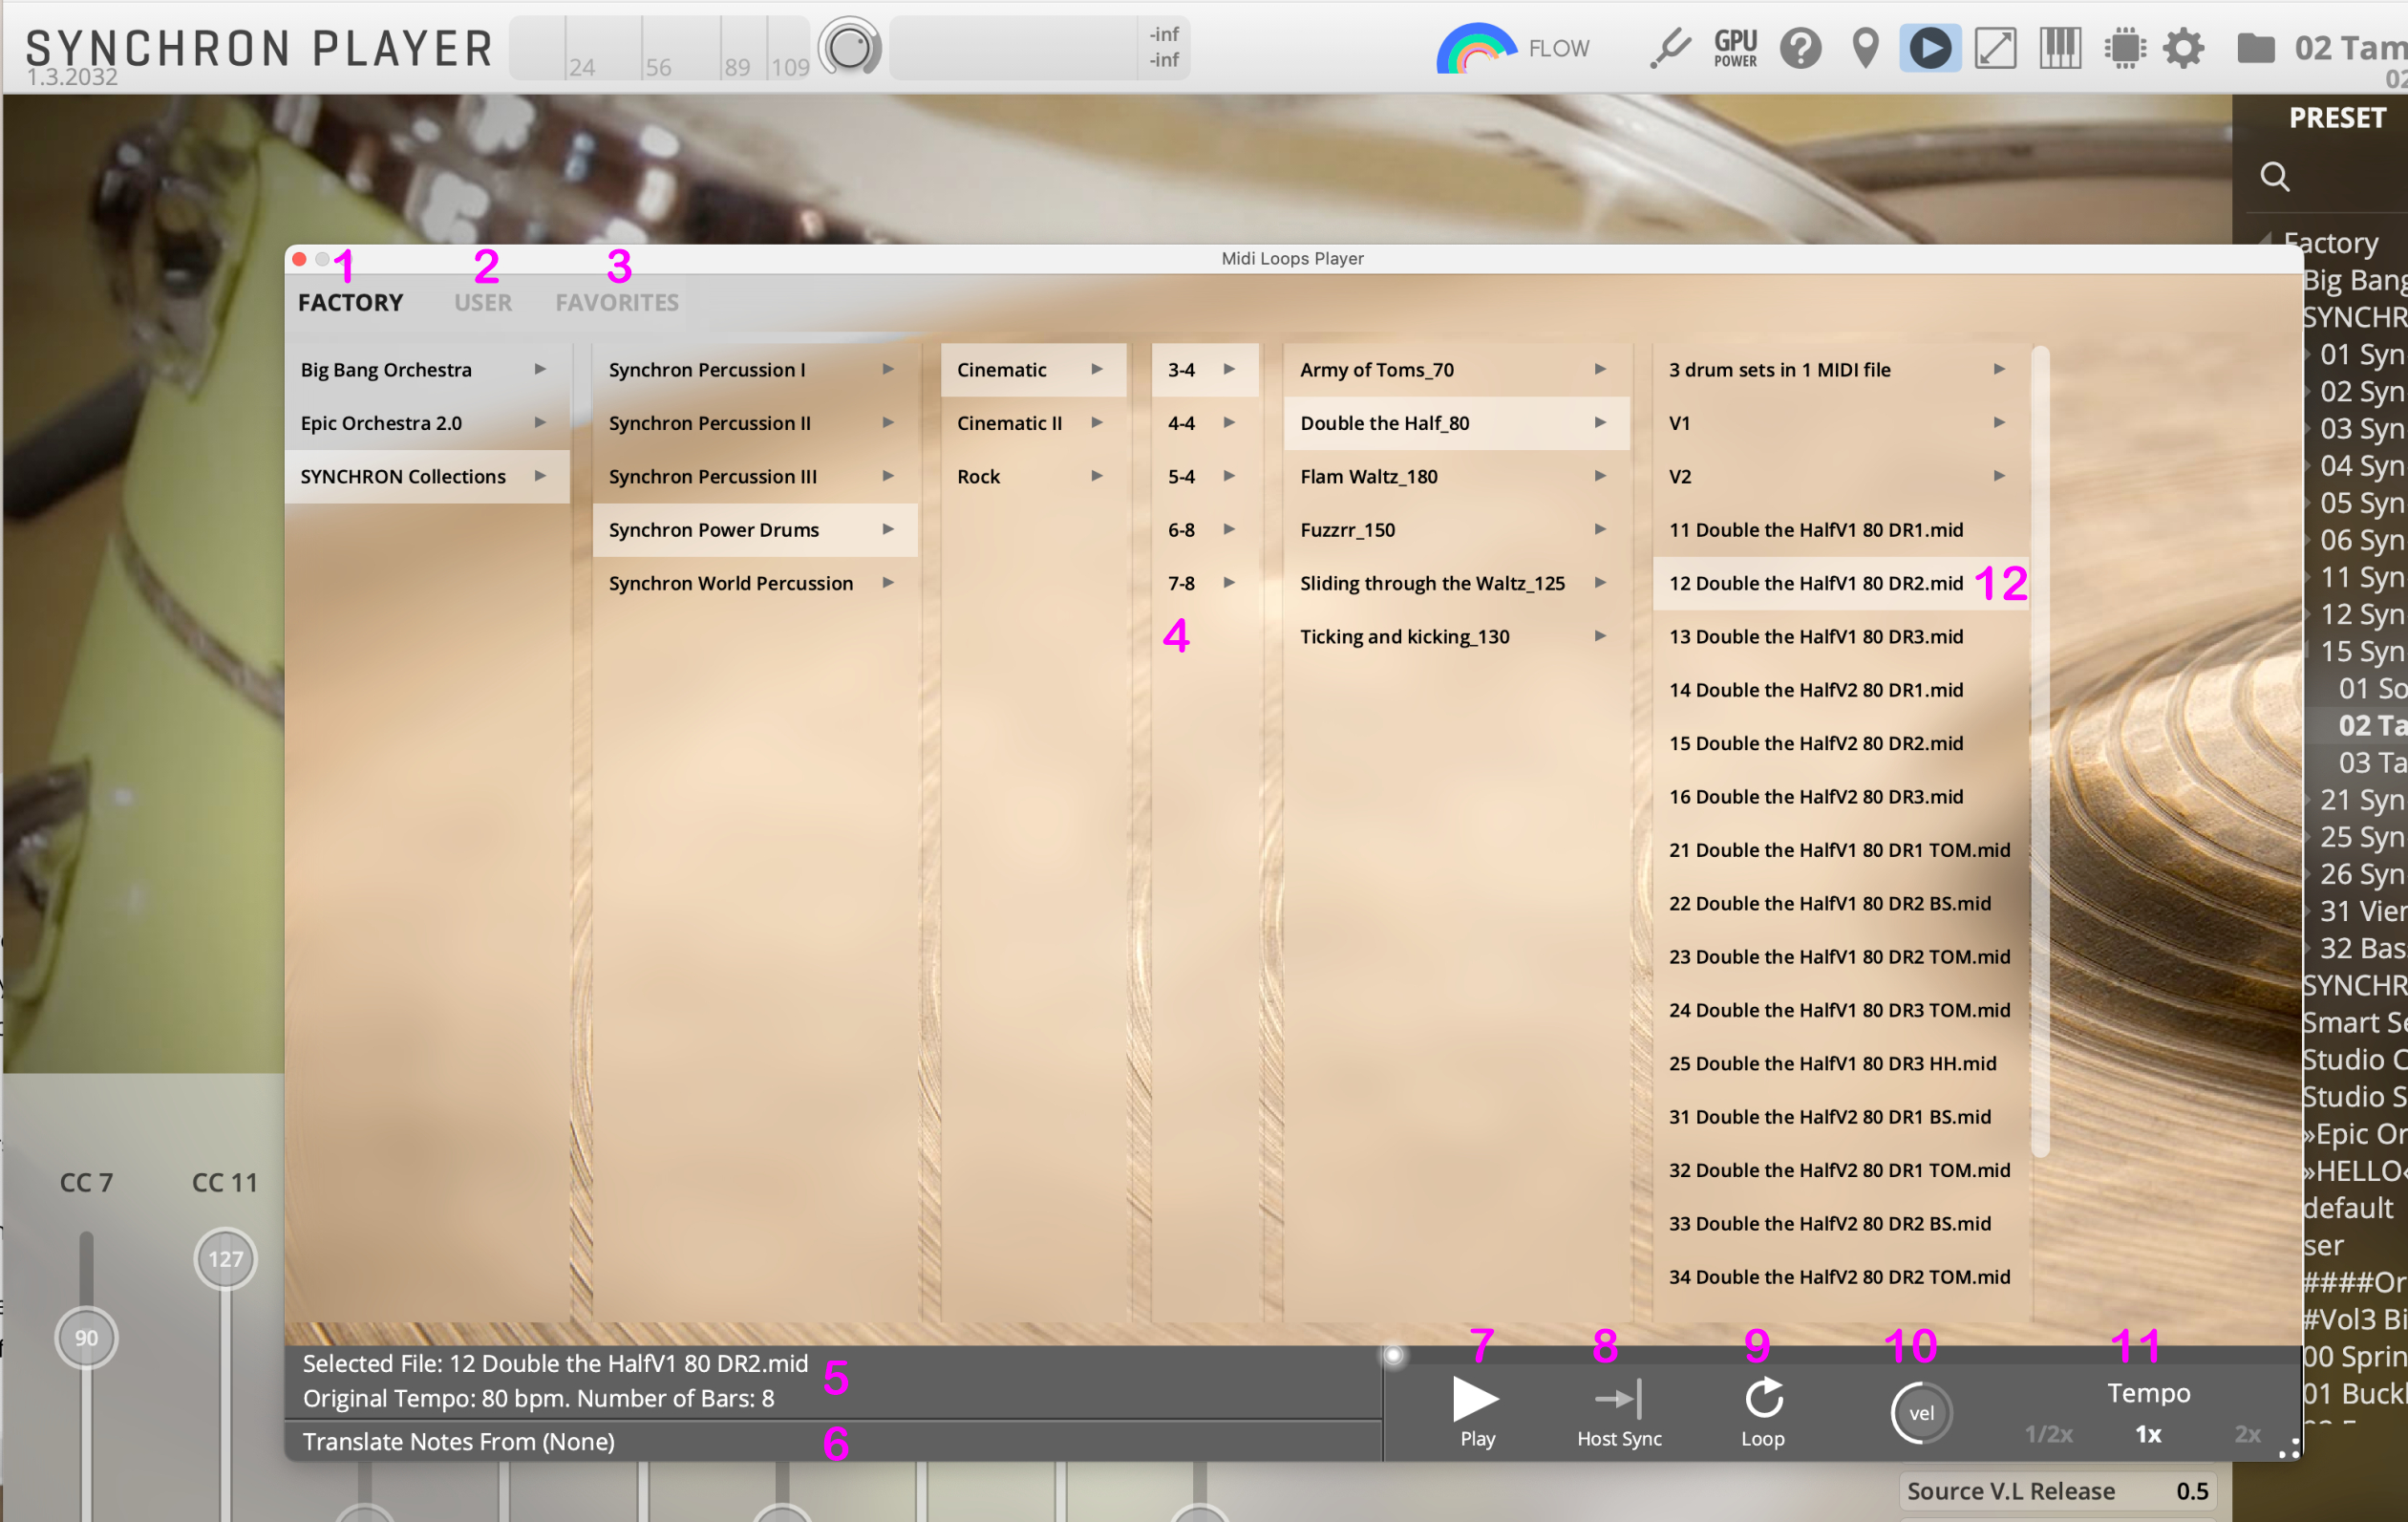
FACTORY: Choose from the custom loops available with Synchron Power Drums.
USER: Browse through your personal MIDI Loop collection, with all the features of the MIDI Player.

FAVORITES: Pick your favorites with a right-click on the selected folder and it will show up here.
Browser: Like in Finder / Explorer, you can move through the available structures.
Loop data: Name, original tempo and the number of bars of the selected file are displayed.
Play/Pause: Click this button to start the selected loop. Alternatively, you can also double-click the file name.
Host Sync: When activated, the Play/Pause button is disabled and playback will start when your sequencer starts.
Loop: Activates the loop for a selected groove.
Velocity: Adjust the overall velocity for your loop and find out which velocities fit best. The setting will be exported when the file is dragged into your sequencer.
Tempo: Choose between half-time, normal and double-time. The setting will be exported when the file is dragged into your sequencer.
Loop position: Shows the playback position of the selected groove.
The list of available loops with the current selection.
The Key Info provides an additional view of the mapping structure and is a free-floating window.
It shows both keyswitches and mapping information. It will be most helpful with complex mappings – as is the case with most percussion instruments, where separate articulations and hits are mapped to different keys in a single patch.
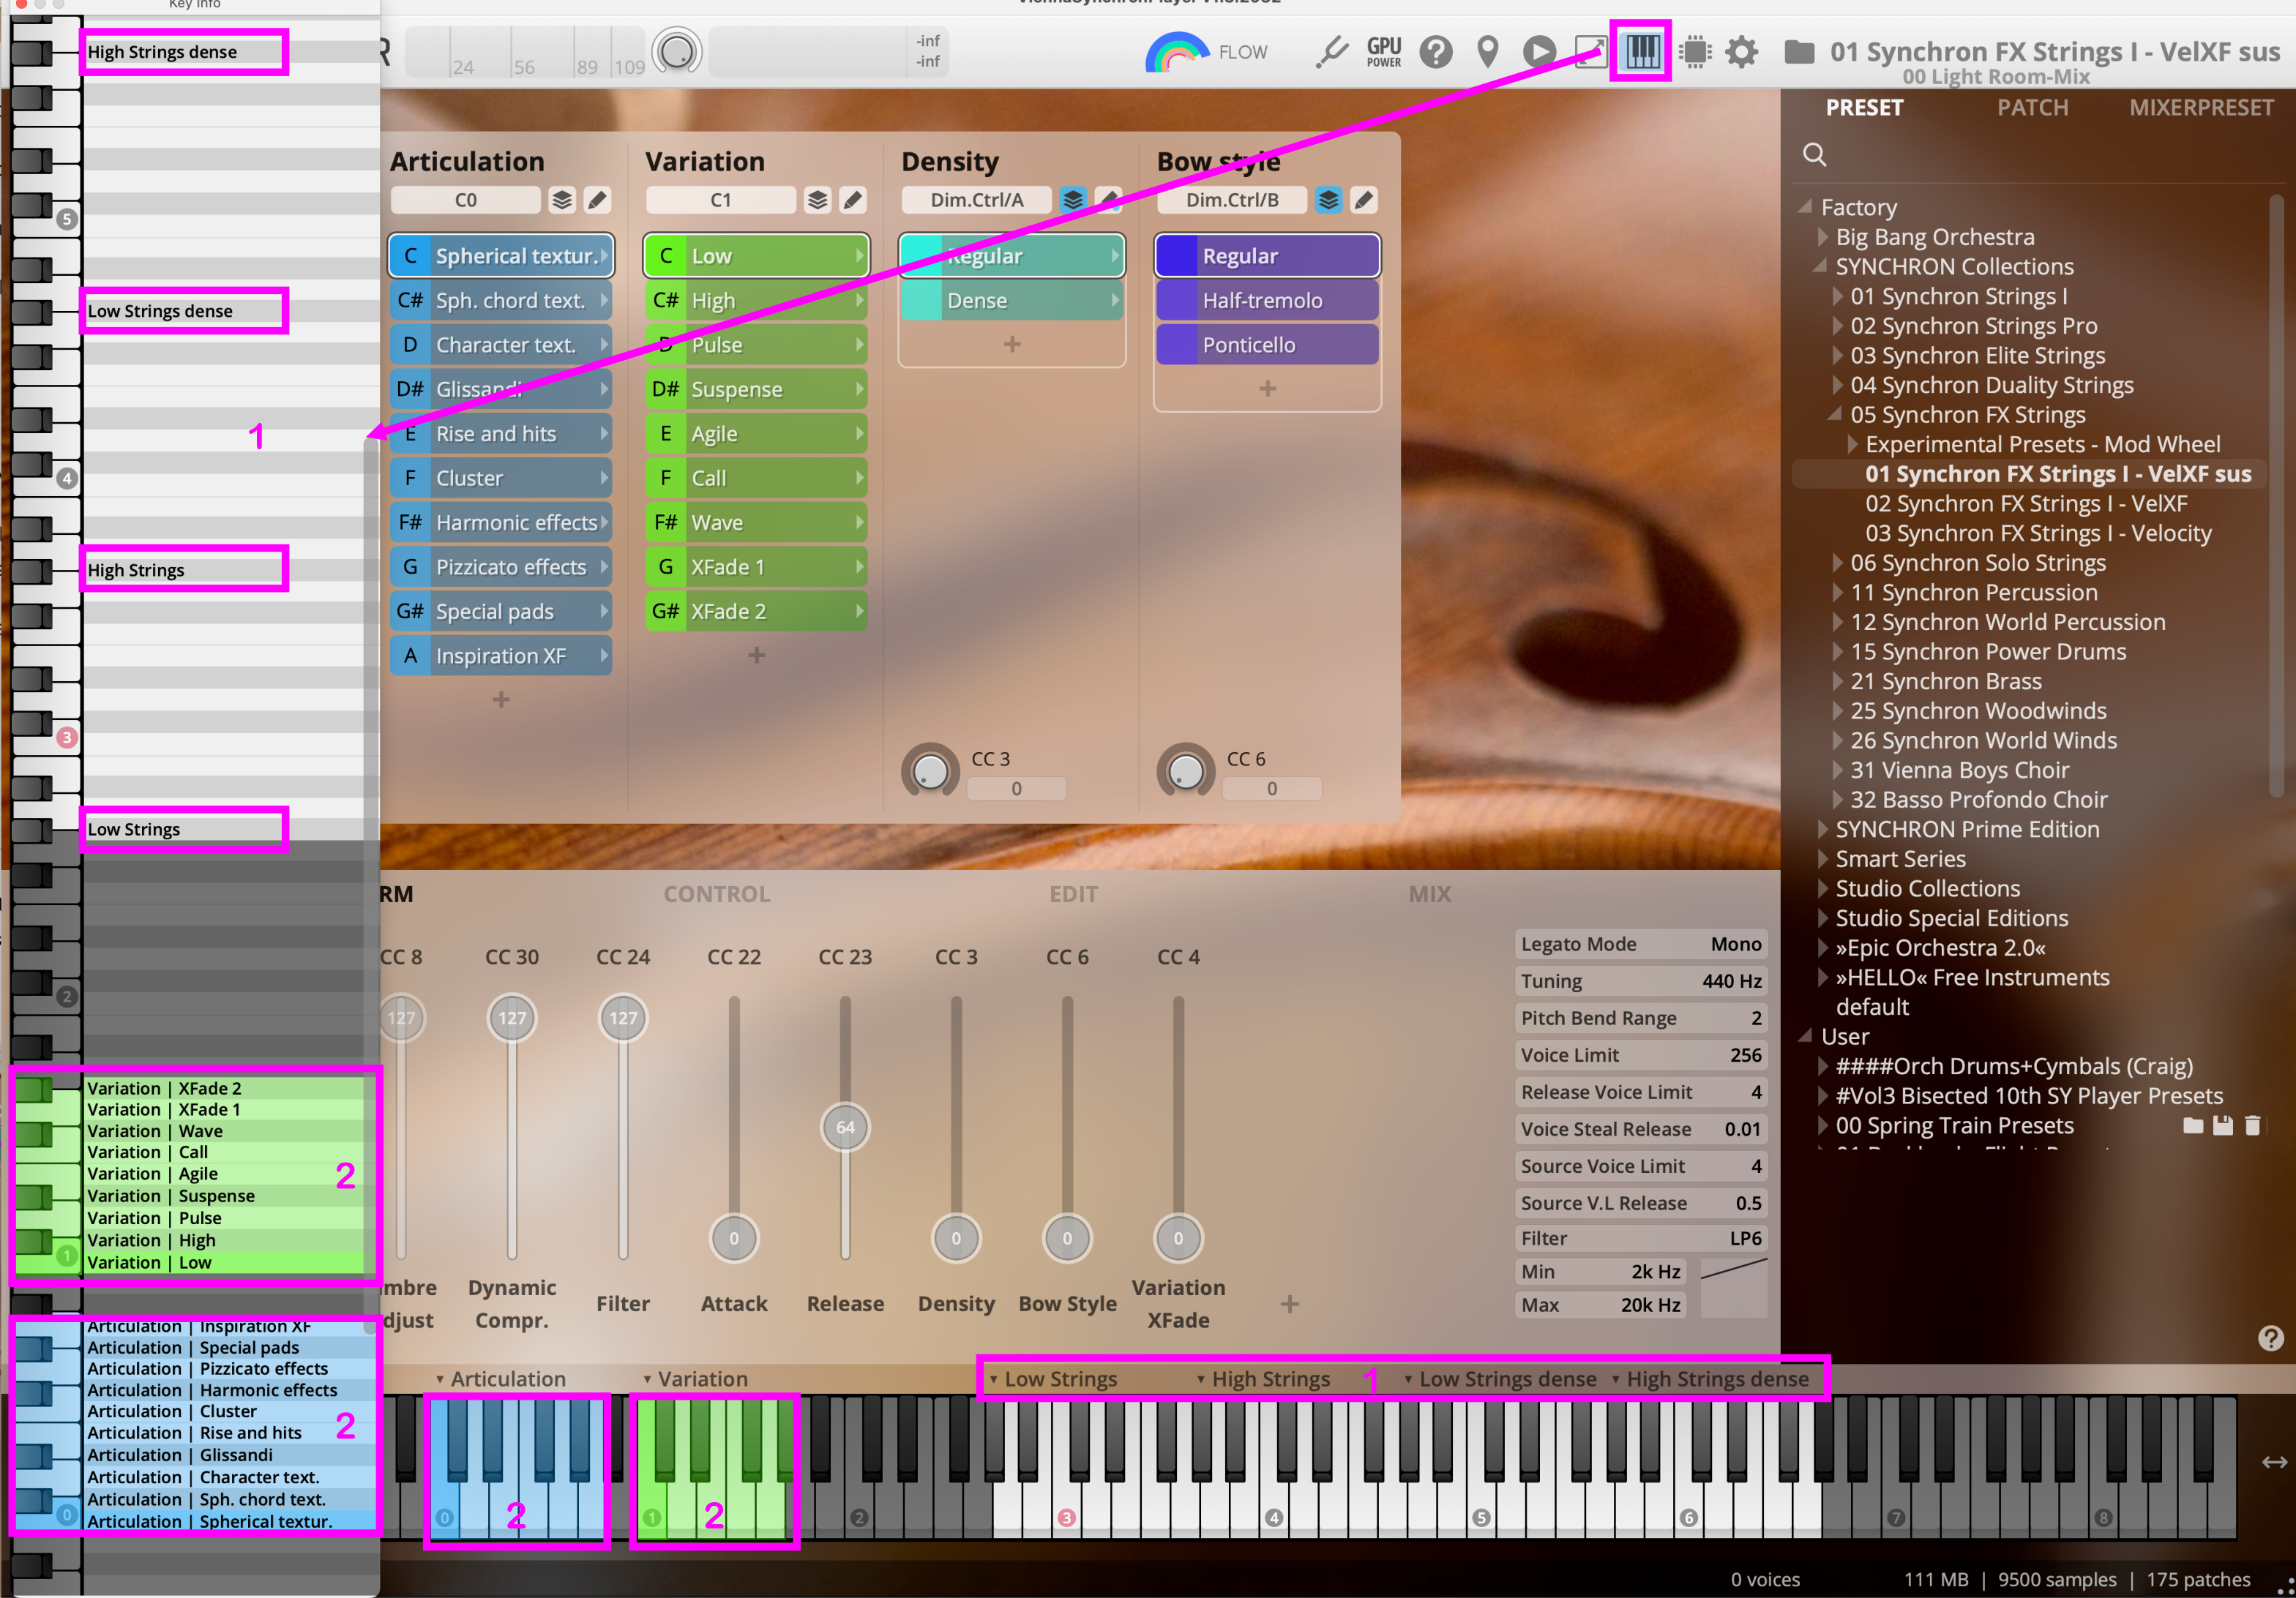
Key descriptions: Get the mapping details for the selected slot.
Keyswitches: Displayed on both the keyboard and the key info window (in the same color as the corresponding dimension of the Dimension Tree), the color-coded keyswitches will make orientation even easier.
Activating the Range Display Features shows the range of the selected patch/slot (in the dimension furthest to the right).
You can extend or limit the play range of the selected slot up to one octave up and down.
